How to Make Resin Art – 2022 Beginner’s Guide
Welcome to resin art for beginners!
So the mesmerizing art of resin has caught your eye. You’ll have some questions if it’s all brand new to you.
These questions may include, “how do I start making resin art?”, “what do you need to make resin art?”, or “where can I get resin art supplies for beginners?”
And that’s where we come in. We’re here to answer some commonly asked questions and provide a guide covering all the basics you need.
When you’re done reading this, you’ll be ready to create your first masterpiece!
What Is Resin Art?
We view resin art as anything created from resin.
It could be something that you poured resin onto or something that you cast resin into.
Let’s look at some resin art ideas for beginners:
- Canvas creations
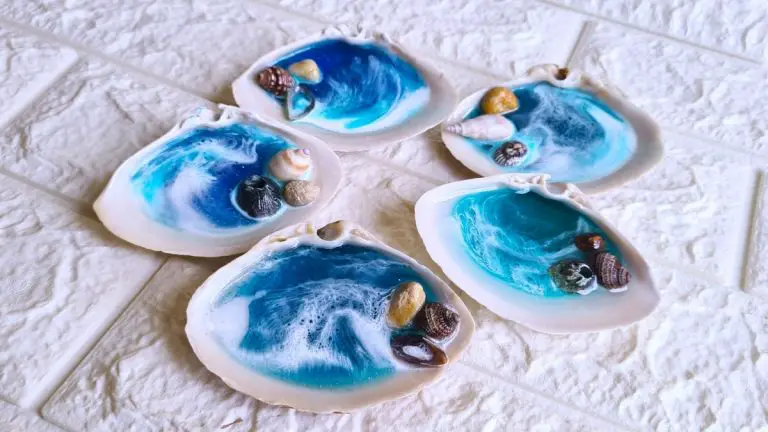
- Coasters
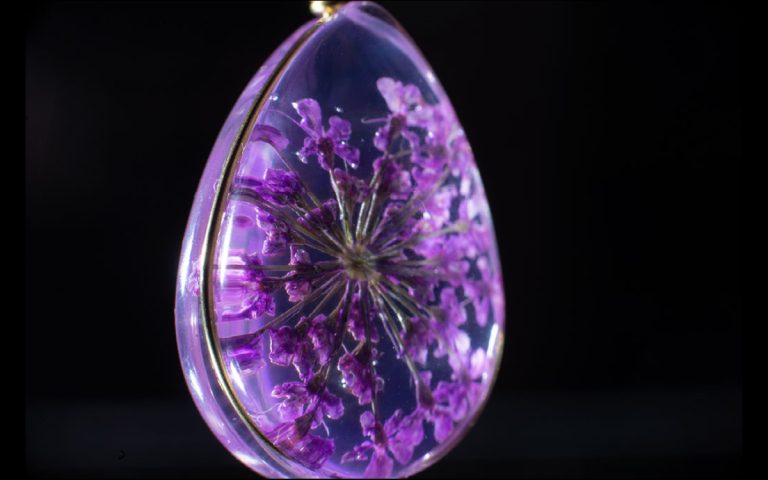
- Jewelry
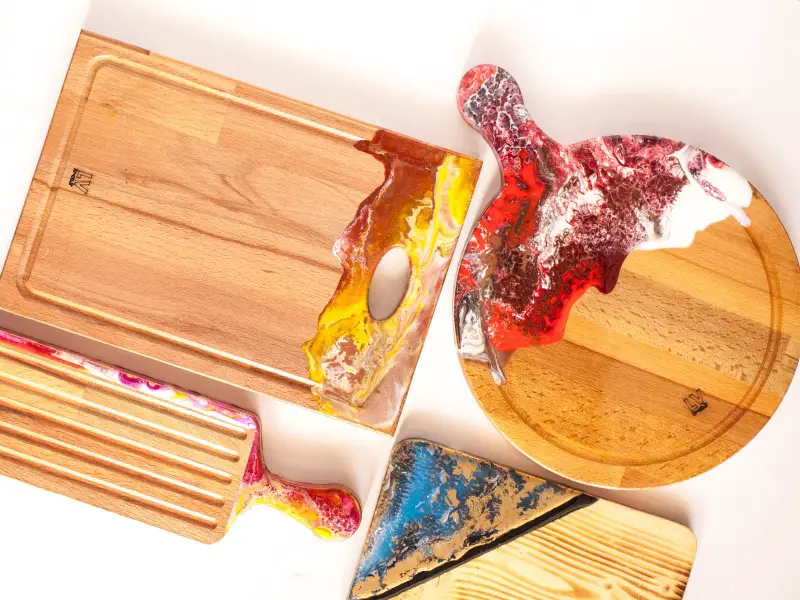
- Cheese boards
- Dog tags
- Keychains
There are many more examples, and that’s one of the beauties of resin art – its only limit is your imagination.
Resin Craft Techniques
There are two techniques to create resin art:
- Pouring resin
- Casting resin

Let’s look into these a bit more.
Resin Art by Pouring
Essentially you will always pour your resin because it’s a liquid. However, when we refer to the technique of creating resin art by pouring, we’re talking about pouring resin onto a flat surface with no border.
Two examples we mentioned before are canvas creations and cheese boards.
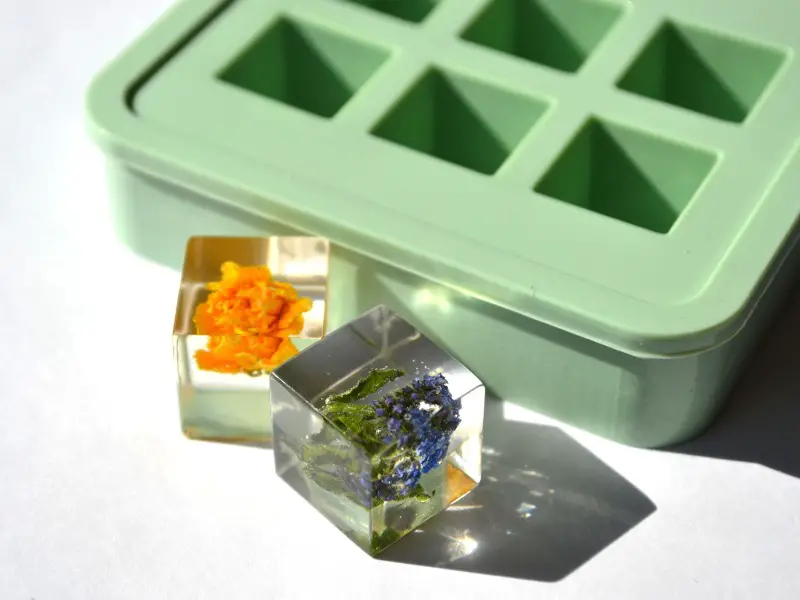
Resin Art by Casting
Now, this technique requires a mold. To create these art pieces, you will cast your resin into a silicone mold, shaping your creation and holding it in place while it cures (cure is just resin talk for “setting”).
Examples we mentioned before: coasters and jewelry.
We’ll dive into each technique’s “how to” a bit later. But for now, let’s answer some of your burning questions.
How To Get Started With Resin Craft
First, you’ll need an idea of what you want to create. Pinterest is an excellent place to get your creative juices flowing if you need inspiration.
Once you have a project in mind, you’ll need a few supplies.
Pro Tip: Start small… Resin, colors, boards, and other materials are expensive.
So allow yourself to make mistakes by creating some small test artworks first. Practicing on smaller artworks like coasters and bookmarks to start with is the best way to learn all about making resin art.
By doing this you will learn, how to mix the resin to avoid bubbles, how much colorant to use, how long you have to work with the resin, and many other things before you start making big artwork.
What Do I Need to Make Resin Art?
- Resin (resin + hardener)
- A mold or a base
- Mixing cups
- Mixing sticks
- A scale
- Nitrile gloves
- A respirator
Now depending on what you’d like to create, you might also need:
- Alcohol ink
- Mica powders
- Inserts (gold leaf foil, leaves, shells, etc.)
- A heat gun
Our article on resin casting gives you a complete breakdown of the type of resin you should use, the required tools, and how to mix the resin.
Your health and safety are also essential. Our article on Epoxy Resin Safety explains everything you need to know about how to protect yourself while working with resin.
Where Can I Get Resin Art Supplies for Beginners?
For your convenience, our articles include links to products from multiple stores. So you can just click on them and add them to your cart!
Alternatively, you can visit your local craft shop or art supply store.
Tip: It could be helpful to join a resin craft group on social media that’s based in your country. Facebook has a few, and these groups provide a wealth of knowledge on where to go, what to buy, which store has a sale, and where to shop for the best prices.
How To Make Resin Art
Learning something new can be confusing and a bit overwhelming. We know this because, once upon a time, we were beginners too!
We want to keep this simple and informative. And we want you to feel confident and comfortable when you’re done reading this article.
We’ll cover both resin art techniques and include a step-by-step guide.
Let’s do this!
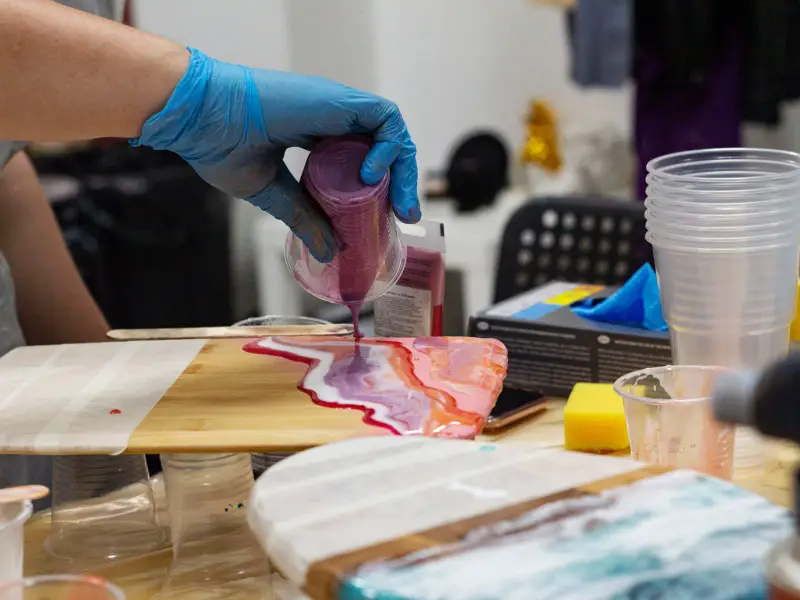
How To Make Resin Art by Pouring
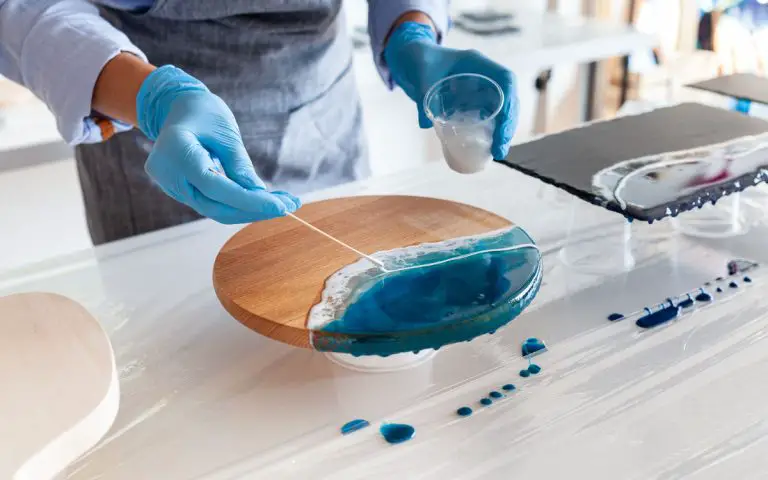
As we mentioned, this technique requires a flat surface with no border. Let’s use a wooden cheese board as our example.
Step 1: The Set Up
- Ensure your workspace is at the ideal temperature – around 24 degrees Celsius.
- Put on your safety gear.
- Ensure that there’s sufficient ventilation.
Tip: Use new boards only. Using that old cheese board in your cupboard might be tempting, but we advise against this. A used board has been exposed to oils and liquids, which have been absorbed into the board. This will react with your resin and could cause your resin not to cure properly.
Step 2: Prepare Your Project
- Place your wooden cheese board on your work surface. It’s best to elevate it. You can place it on some plastic cups.
- Make sure your board is level. Resin is a liquid and will move where you don’t want it to if your surface is not level.
- Tape the back of your board with painter’s tape. This will act as a barrier. Any resin that drips off the sides and onto the back of the board will dry on the tape and be removed.
- Wipe your board with a clean, lint-free cloth to ensure that the surface is clean and dust free.
Tip: Use food-grade resin when working with cheese boards or creating any piece that might come into contact with food. Resin can be harmful if consumed. Using an FDA-approved food-grade resin is the safest option but should also not be consumed.
Step 3: Get Your Resin Ready
- Choose your color pigments – mica powders or alcohol inks.
- If you want to include any inserts (gold leaf foil, flowers, glitter, etc.), ensure they’re within reach.
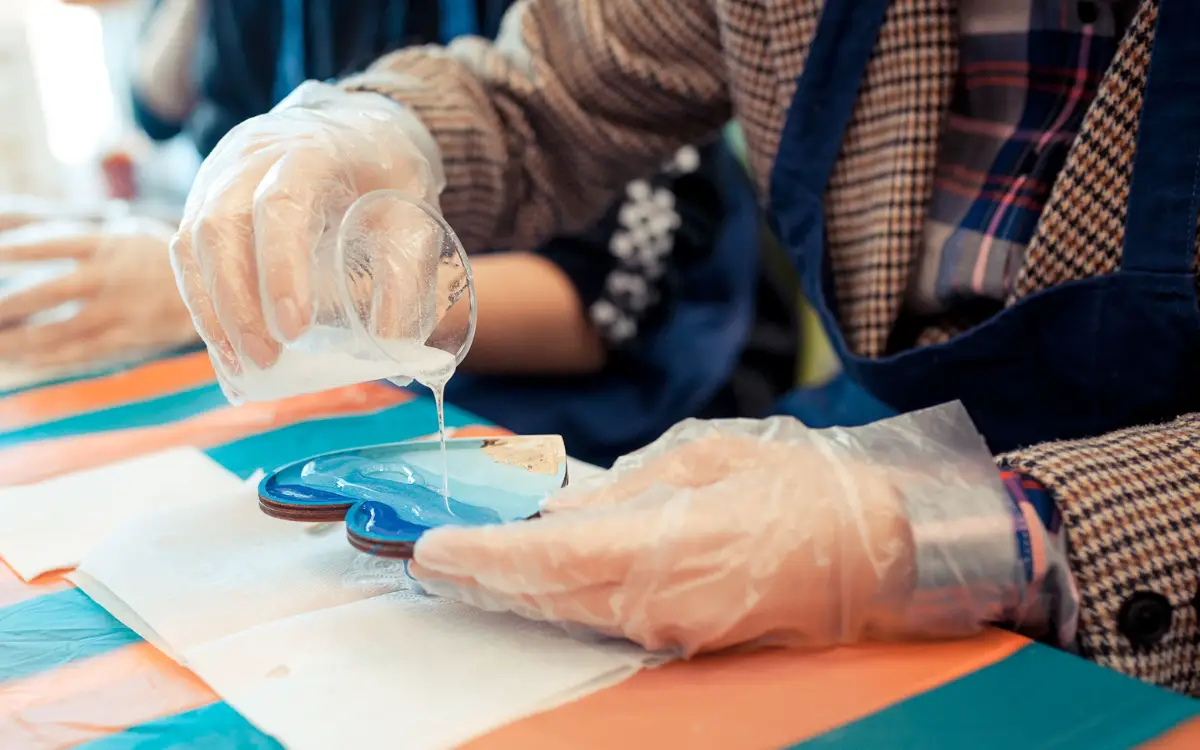
- Now measure and mix your resin and hardener and add your color pigments.
- Be mindful of how much working time you have with your resin:
- Working time refers to the time you have to pour your resin before it starts to cure and becomes unworkable or too thick to pour.
- Refer to the datasheet or label on the container to be sure.
- Keep a clock nearby to help you keep track of the resin’s working time.
- With this technique, you want your resin to be a bit thick; otherwise, most of it will run down the sides. It will thicken after a minute or two. Stir your resin to check that it is pourable but not too runny.
Step 4: Time to Pour
Now the real fun begins!
- Slowly pour your resin onto your cheese board. It will spread and run down the sides, so it’s best to pour slowly to give yourself some control of the design or pattern you want to achieve.
- Depending on your design, you can pour one or a few colors.
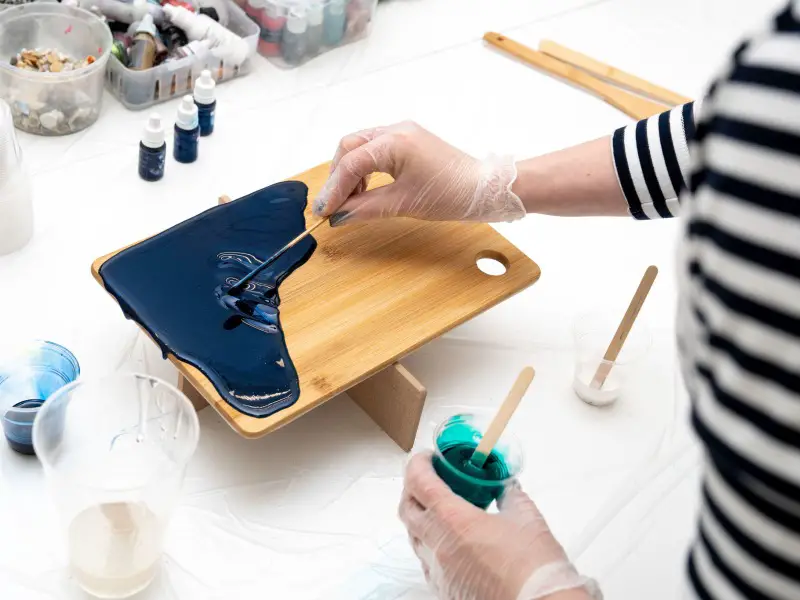
- If you want to create depth, pour a base color and let it settle for a minute. Then pour a contrasting color, perhaps one mixed with glitter or shimmer pigment. Doing so will create a layered effect instead of a smudge of colors running down the sides.
- If you want to create a marble effect, pour your colors next to one another and use a heat gun or mixing stick to swirl the colors together. Be careful not to add too much heat, as this will heat your resin and make it runny again. We want to keep as much of the resin on top of the board.
Step 5: Curing Time
- And now for the hard part – sit and wait!
- Resin usually cures within 24 to 72 hours. Check the datasheet or label to be sure. If it’s hard to the touch, then it’s cured.
- You can now peel off the painter’s tape. This can be a bit hard once the resin has cured. We suggest you take a heat gun and heat the tape a bit. This will soften the resin and make it easier for you to peel the tape off.
- If you don’t have a heat gun, then peel it off as best you can and then use a blade to scrape off any tape that is left behind.
- Either way, you will most likely need to sand the back of the board. This is optional but makes for a smooth finish.
- You can then use wood oil to seal your board. Here’s a great option: Kate Naturals Mineral Oil (Paid Link).
How To Make Resin Art by Casting
As you now know, this technique requires a mold.
You can check our article on resin casting for a complete step-by-step guide on casting resin into a mold.
There are a lot of similarities between the casting and pouring techniques, so we’re going to point out the main differences while following the same steps listed above.
Step 1: The Set Up
There is no difference here. Follow the same steps as above.
Step 2: Prepare Your Project
- The main difference here is that you need to prepare your mold.
- Make sure it is clean. You can use sellotape or painter’s tape to remove dust or leftover resin. You will do this by dabbing the tape into the mold. Any dust or resin will stick to the tape and be removed from your mold.
- Spray your mold with a release agent. This protects your mold and increases its life span. We recommend Ease Release 200 (Paid Link).
Step 3: Get Your Resin Ready
Here again, you will follow the same steps as above. The only difference with the casting technique is that you might not want your resin to be thick:
- When casting your resin into a mold, it’s going into an enclosed area which could result in air entrapment.
- This is resin talk for “getting air bubbles trapped in your resin”.
- Air bubbles are harder to float to the top when the resin is thick.
- Also, the resin will not flow easily, which can trap air bubbles.
- You might end up with hollow pockets at the bottom of your project.
- If this is the design you want, then go right ahead! If not, make sure you cast your resin while it’s still runny.
Step 4: Time to Pour
There is no right or wrong way to do this.
If you want to create a specific design, you might need to cast your resin in a certain way or order.
Otherwise, just go for it!
Step 5: Curing Time
Nothing changes here.
The only difference is that you will de-mold your piece once it has cured.
This means you will remove your resin piece from the silicone mold.
Tip: Cover your pieces while they are curing to stop dust from settling on them. You can place a plastic container over your project. Ensure the container is big enough to allow your project to “breathe” while curing. The container shouldn’t touch your project in any way.
Help! Why Did This Happen?
Guess what? You might bump your head a few times while you learn this art.
And that’s fine. It’s all part of the process.
Let’s look at some common beginner mishaps and how to avoid them.
Why Are There Air Bubbles in My Resin?
This happens when air gets trapped, and there are two main reasons why this occurs:
- Mixing Too Fast
- Always mix your resin slowly.
- This might seem tedious, but it will save you a lot of grief – promise!
- The quicker you mix, the more air you’ll introduce into your resin.
- It Was Too Cold
- The ideal temperature for the resin to work at its best is around 24 degrees Celsius.
- If it’s too cold, the resin will thicken.
- A quick fix is to put your resin in a “warm bath”.
- Before combining your resin with the hardener, measure the amount of resin you need.
- Now take that container and place it inside another container with some warm water.
- Stir your resin while it sits in this bath, and you’ll see it becomes runnier.
- You can now combine it with the hardener, which will mix through much more easily.
Tip: Air bubbles will usually float to the top, and you can either pop them with a needle or apply some form of heat, like a heat gun or torch. Don’t get the torch too close, as it could burn your resin. You only want the heat, not the flames.
Why Is My Resin Still Sticky?
This could be because your resin wasn’t mixed properly or it wasn’t measured correctly.
Read our article about how to fix sticky resin which covers everything you need to know and how to avoid this from happening to you.
This Isn’t What I Designed – Why Has It Changed?
Resin is a fluid art, and it moves as it cures. This is part of its beauty and what makes it unique. Designs can never be duplicated.
Your finished project will not look drastically different from what you initially created, but there will be subtle changes.
Don’t be too hard on yourself. This is the nature of resin art.
Why Is My Resin Stuck to My Silicone Mold?
This is most likely caused when too much heat is applied:
- For example, the flame from a torch can burn silicone molds and cause them to infuse with the resin.
- Your mold will probably tear when you remove your resin piece, and you won’t be able to use that mold again – and that’s money down the drain.
Another reason could be that the mold has reached the end of its lifespan:
- Resin cures due to a chemical reaction.
- This reaction gives off heat, which eventually wears down the silicone mold as you use it.
- We recommend using a release agent – it protects your mold.
Final Thoughts
Above all else, creating resin art should bring you joy and be your happy place.
Remember, there’s no right or wrong way to learn. Resin art is not just black and white. Play around with colors and patterns, and let your imagination take over.
If you learned something new and enjoyed this article, please let us know in the comments, and feel free to share this article on social media!