Make Ocean Resin Art in 4 Simple Steps
We know why you’re here – you love the ocean, the beach, the waves and so do we!
The colors, the sounds, the smells, and the feeling of being in the ocean – a moment to capture, share, and recreate.
And that’s where we come in – we’re going to help you create your resin ocean art piece by combining your love for resin art with your love for the ocean.
You probably have a few ideas buzzing in your head of what you’d like to make. Perhaps beach coasters, a resin ocean table, or an ocean cheese board.
We’ll cover what you need, what to do, and everything in between! So let’s jump right into it!
Step 1: What You’ll Need
Besides the essential tools and materials to create resin art pieces, you also need some specific items to create realistic beach resin art and ocean resin coasters. Here’s what you’ll need.
The General Tools
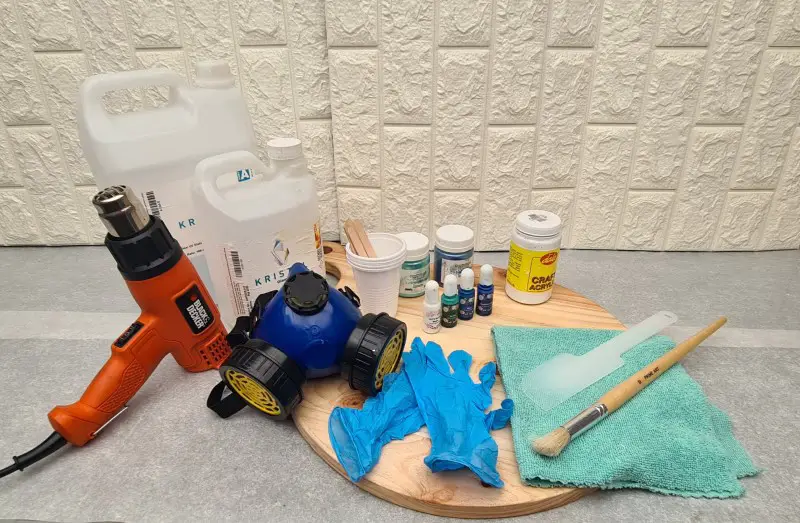
- Epoxy resin
- Mixing cups
- Mixing sticks
- A heat gun
- A torch
- A digital scale
- Nitrile gloves
- A respirator
*Paid Links
Read our article Resin Casting: All You Need to Know in 7 Easy Steps for more detail on these basic needs.
Tools and Supplies for Ocean Resin Art
- Blue color pigments:
- Beach and ocean resin art usually has two or three shades of blue to create depth. However, this is not a hard and fast rule. You can also create pink, orange, or black oceans.
- Mix your colors up to create something new and exciting. For example, add a hint of green, glitter, or mica powder to your blue to add depth to your ocean resin art.
- White color pigment:
- For the iconic waves, you will need an opaque white pigment. A liquid pigment will work well but not an alcohol ink, as this will fade into the resin once mixed and will not create beautiful, solid white resin waves.
- Sand and shells:
- These are not compulsory but can add texture and a realistic feel to your resin beach art.
- Glitter in gold or nude colors can also create the sandy effect of a beach.
Step 2: How Do You Get Resin Lacing?
Yes, we know this is a hot topic, so this process needs a step of its own!
If you’re asking yourself, “what is lacing in resin?” it’s the cells that are created in the resin waves to give it a natural and realistic look.
Achieving this will take practice, and fortunately for you, we’ve gone through the practice phase and can now make your “resin wave-making experience” a bit easier.
What You Need to Create Lacing in Your Resin Ocean Waves
- A heat gun or a hair dryer
This will blow your white resin and create the actual wave.
- A cell-forming pigment
This is either added to your white resin or will also color your clear resin white. It helps to create the cells easily and lacing effect. Check this product on Amazon Eye Candy White Pigment Paste (Paid Link).
You can use different techniques to create different types of waves. This will depend on the type of white pigment you use, the way you hold your heat gun, and the type of nozzle you use on your heat gun.
Please play around with the options available, as you might discover an excellent technique and effect that makes your resin beach art stand out.
The Easiest Way to Get Resin Lacing
We’ve tried a few methods, and this is by far the easiest and the most effective way with the least effort – add a cell-forming pigment to your resin.
Your waves will create lacing without much effort. Here’s how:
- Add the cell-forming pigment to your resin according to the instructions.
- You might only need a drop or two, as this liquid pigment is quite potent.
- Also, mix it gently. Do not stir vigorously.
- After you pour your ocean base (the blues), add the white resin where you’d like the waves to be.
- Your waves can be anywhere in your ocean design.
- To help with a realistic look, add your waves where your blue shades meet and on the edge of the lightest shade – basically the beachfront.
- Use your heat gun at a low angle to the board to blow the waves toward the back of your ocean.
- Make sure that the air is blowing onto the white resin and hold it on one spot for one to two seconds and then move along the wave.
- If your heat gun has different settings, start on the lowest setting before moving to the higher ones. It’s safer to add too little heat than too much heat.
- As the heat gun heats the resin, it will create movement, which will spread the white resin, form the lacing, and create a wave.
- Continue moving your heat gun along the wave until you’re happy.
- Initially, you can start by blowing straight onto the wave. Then, as the waves and lacing form, you can hold your heat gun at an angle, blowing at a 45-degree angle from the left and right sides.
- If the wave is too subtle, add white resin and repeat the process.
- Be careful not to add too much white resin, as the wave could overpower your project resulting in a white blur.
Tip: Don’t blow your heat gun onto one spot for too long. This will burn your resin and create a ripple effect on the finished product. The best practice is to blow for one to two seconds and then move on. But, of course, you can always return to the same spot after 5 to 10 seconds.
Ok, so we’ve covered what you’ll need and how to create lacing. Now we’ll move on to the prep work.
Step 3: Prepare Your Workspace
As you might know, you only have a limited amount of working time with resin. This is usually around 20 to 40 minutes, depending on the brand of resin you use, and should be indicated on the label. After this time, your resin will start to cure, and you won’t be able to pour it and work with it efficiently.
Therefore, it’s best practice to be organized and prepare your workspace before mixing your resin to use your resin’s working time to its fullest instead of using that precious time to look for a mixing stick or a different color pigment.
Decide on a Project
This decision will guide the rest of your prep work. Such as how much resin you’ll need, what colors you’ll be mixing, how many mixing cups you’ll need, which molds or blanks you need to lay out, and so forth.
Pro Tip: Have in your mind the size and look of the waves you want to create on your resin beach. This is important because when you blow out the white resin to make your waves you only want to do it once and then not touch it again so that you get nice cells and lacing.
Lay Out Your Tools and Materials
Have everything you’ll need for your project within reach – not on the shelf in the garage behind the freezer. This includes your resin, digital scale, heat gun, color pigments, PPE, etc. If you need a tweezer or a toothpick, get that too!
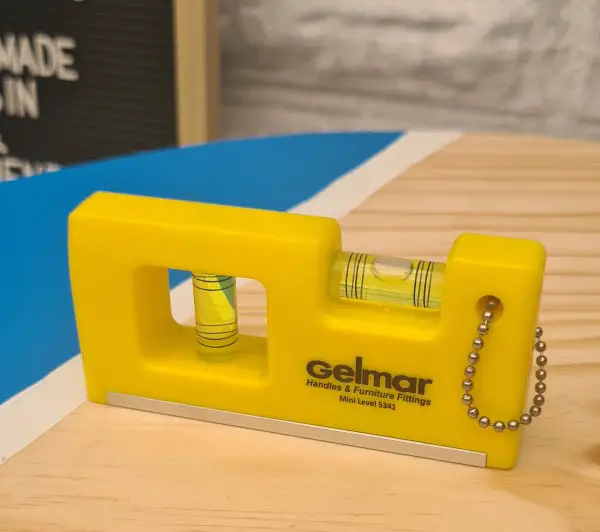
Prep Your Blank or Mold
Make sure your mold is clean. You can remove dust by dabbing your mold with painter’s tape or sellotape. If you’re working with a board, get your level out and ensure that the board’s surface is level and dust free.
Put On Your PPE
This is the last step before mixing your resin and probably the most important one because it’s your protection. You might not always smell it, but resin does give off harmful fumes once combined with the hardener.
Also, while your creativity is in full swing, a drop of resin might get into contact with your hand as you mix or pour. So make sure your PPE is on – nitrile gloves and a respirator are of paramount importance.
Read our article on epoxy resin safety for more detail on your safety when working with resin.
Get the Temperature Right
Ensure your workspace is at the ideal temperature – around 75 Fahrenheit or 24 degrees Celsius.

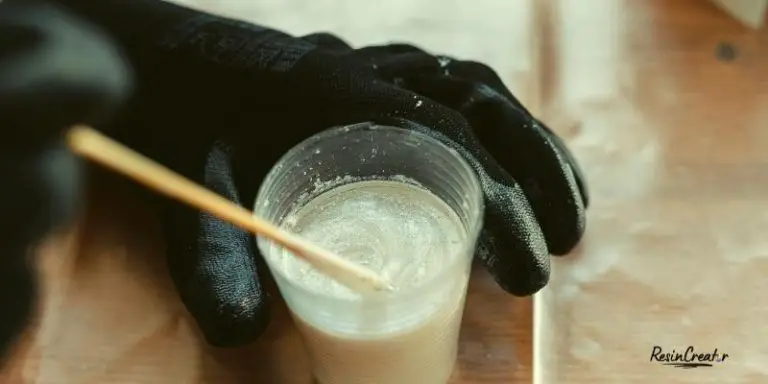
Mix Your Resin
Weigh out and mix your resin according to its instructions. Once mixed, pour it into separate mixing cups. For any resin ocean art, you’ll need a minimum of four mixing cups: two cups for your two shades of blue, one for your white resin, and one for some clear resin – in case you need to top up one of your colors.
Refer to step 5 in our article about resin casting for more detail on how best to mix your resin.
And now we’re ready for the best part! Let’s go!
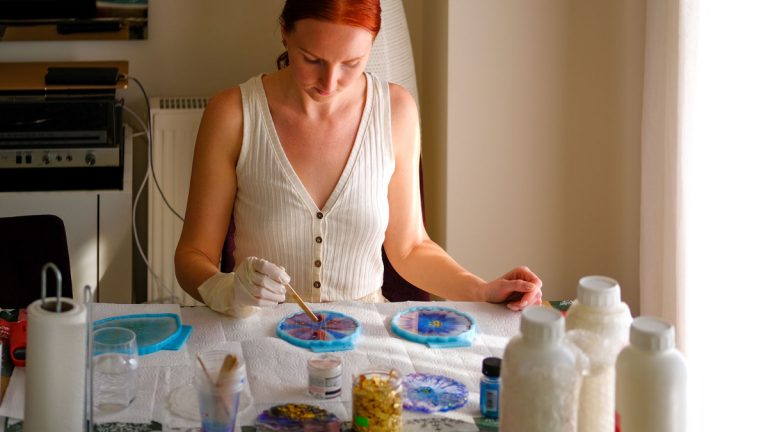
Step 4: Making Ocean Resin Art
So what are we making? We gave this some thought and realized that making a cheese board (a flat surface with no rim or mold) and a coaster (using a silicone mold) would involve different techniques and slightly different processes.
And so we decided to make both! This is to equip you with a holistic view and to provide you with options before diving into your first ocean resin art piece.
And for the fun of it, we decided to add a third project – something small that won’t use a lot of resin (yes, we know resin is expensive!), so you can play around with this idea and make mistakes and learn without breaking the bank!
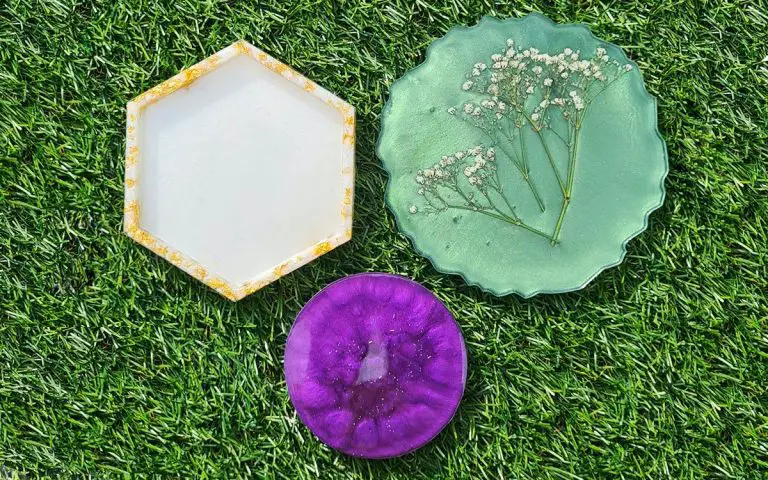
So to sum it all up, we’re making:
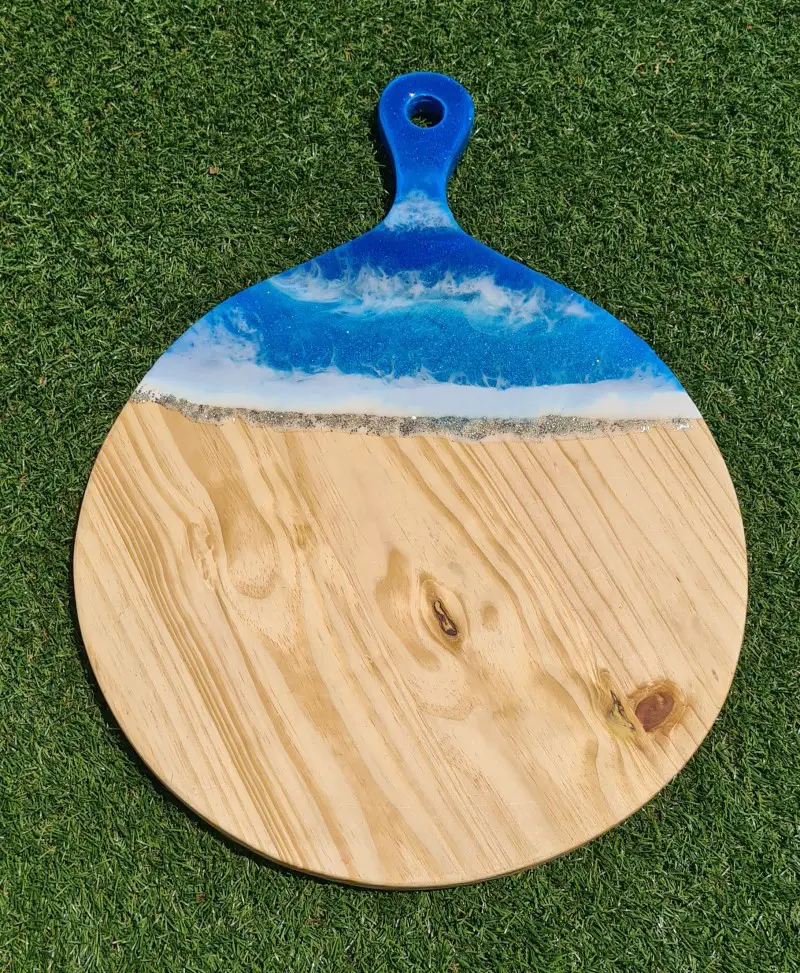
- A cheese board
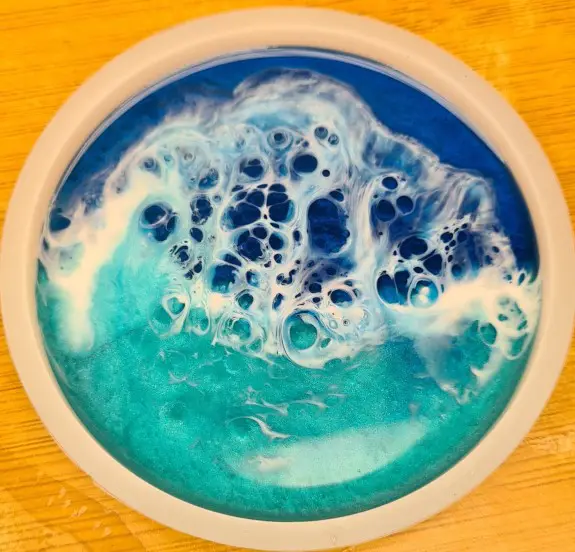
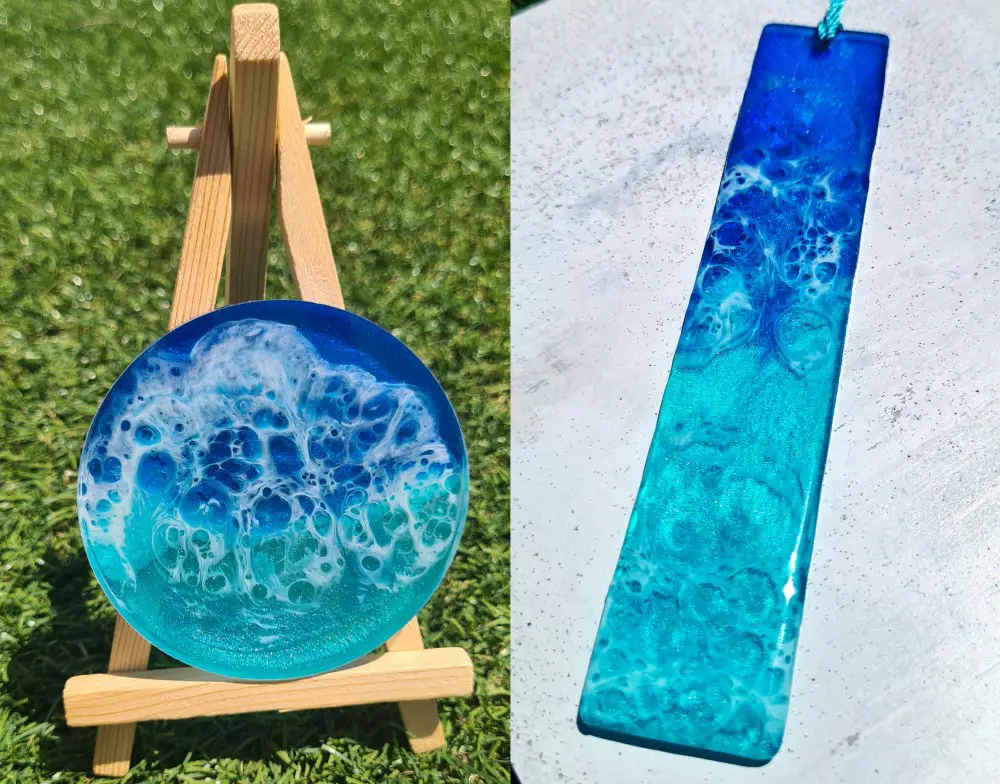
- A coaster
- A bookmark
Making an Ocean Resin Art Cheese Board
Tape the Back of Your Board
This step is optional. It helps reduce the number of resin drips onto the board’s back. You’ll sand the back more if you choose not to tape your board.
Sometimes the tape is also tricky to remove once the resin has cured. A blade will help to remove it, or heating the tape with a heat gun will soften the resin, making it easier to remove.
Paint Your Board
This step is also optional. Painting your board will make the color of the resin pop more. Or you can let the grain of the wood show through the resin by not painting it.
Tip: You should seal any type of wood you are using with varnish, paint, or a bit of resin first to stop the piece of wood from releasing bubbles into the resin.
Elevate Your Board
The resin will drip off the sides of your board. For this reason, you need to elevate your board so that the resin drips off the board instead of creating a pool of resin underneath it.
This will result in a big mess, and your board could end up being stuck to your work surface. Instead, you can set the board on top of empty yogurt tubs (of the same size) or any object that it can rest on and be level. Place newspaper or a plastic sheet on your work surface to protect it from the resin drips.
Pour Your Base Colors
Pouring resin is an art, so there is no right or wrong way of doing it. However, start from the edge or handle with your darkest shade and then pour your lighter shade/s.
This will mimic the natural look of the ocean. You can also add your “beach” at this stage. So, either use sand mixed with resin or glitter mixed in clear resin to give that sandy look.
TIP: Let your resin stand for about 5 minutes after mixing it. This will allow the resin to thicken up slightly. This is helpful when pouring resin onto a board because it won’t run off as easily.
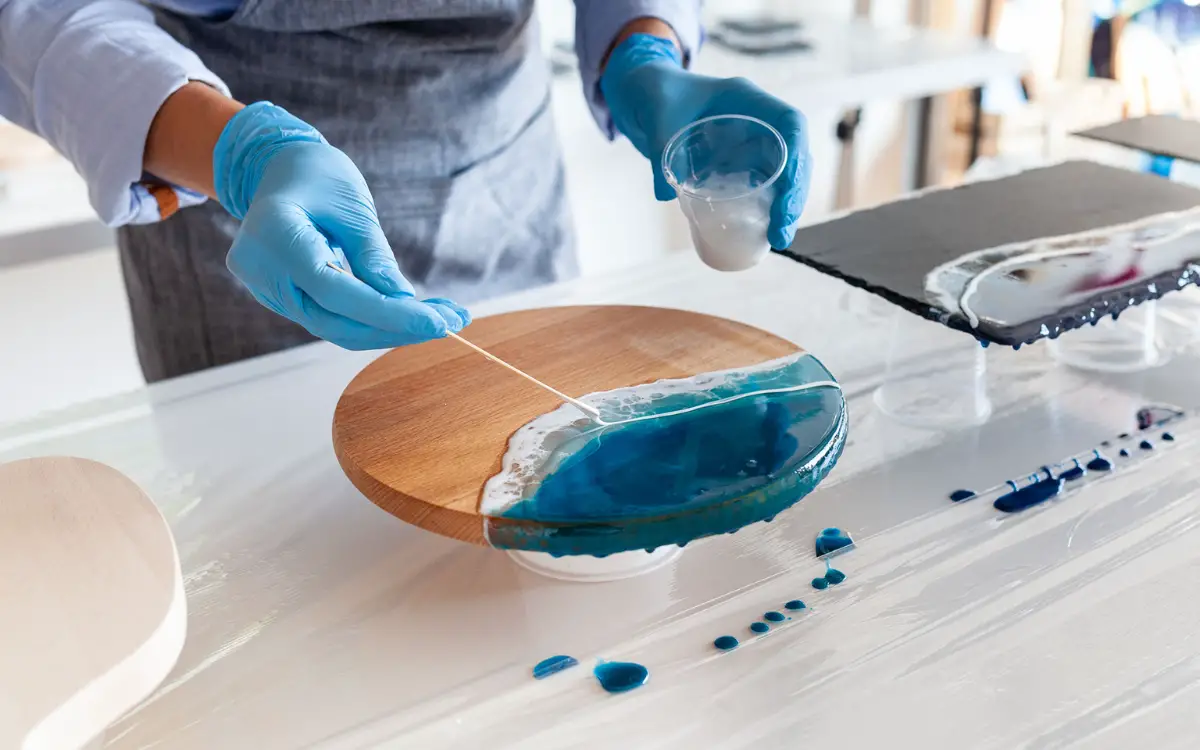
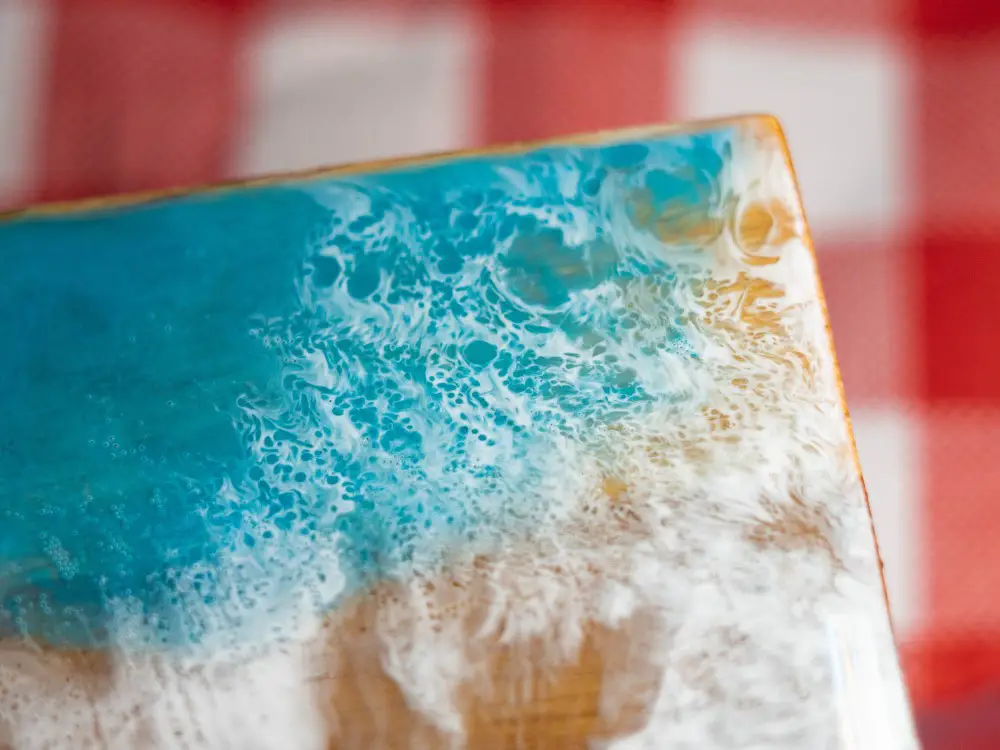
Create Your Resin Ocean Waves
Now you can add your white resin and create your waves and lacing. If you missed it here is how to make your waves.
Once you’re happy with your waves, you can use a torch to remove any bubbles. In this case, we recommend a torch instead of a heat gun because the torch will remove the bubbles without moving or blowing the resin.
Refer to “The Easiest Way to Get Resin Lacing” in Step 2 above for a detailed explanation of this process.
Cure and Sand
Now all that’s left is for your resin to cure. This usually takes 24 to 72 hours. When your resin is cured, you can remove the tape and sand down any resin that settled on the back of your board. You can then use wood oil to seal your board. Here’s a great option: Kate Naturals Mineral Oil (Paid Link).
You have the option of adding a flood coat to your cheese board. By this, we mean adding a clear coat of resin over the entire board. This is an excellent option if the board will be used for display purposes only.
If you use the board to serve and display food, then the best and safest option would be only to cover a part of the board in resin. People tend to cut into cheese boards; if the entire board is covered in resin, then pieces of resin could end up in the food and be consumed.
Consuming resin is harmful and should be avoided at all costs. This is why we recommend only covering part of your board in resin.
Tip: Use new boards only. Using that old cheese board in your cupboard might be tempting, but we advise against this. A used board has been exposed to oils and liquids, which have been absorbed into the board. This will react with your resin and could cause your resin not to cure properly.
Tip: Use food-grade resin when working with cheese boards or creating any piece that might come into contact with food. Resin can be harmful if consumed. An FDA-approved food-grade resin is the safest option but should not be consumed.
Making Resin Wave Coasters or Bookmarks
Just to recap: your mold is clean, your resin is mixed, your workspace is prepared, and you’re wearing your PPE.
Now making a coaster and bookmark follows a very similar process. So we’ll do them in one go!
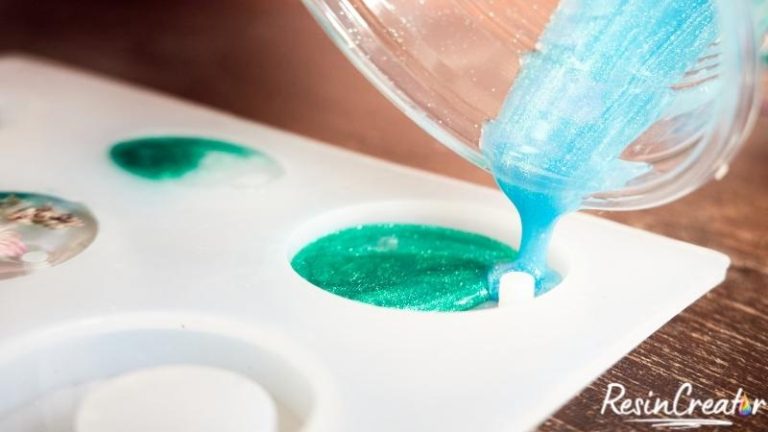
Pour Your Base Colors
When pouring your blue shades of resin into your mold, the trick is not to fill the mold to the top. Instead, fill it only halfway up. Why? Well, picture your mold filled to the brim; now add your white resin and use your heat gun to blow your waves. What’s going to happen?
Your heat gun will blow the resin over the edge of the mold and create a mess. So basically, we’re allowing some room for the waves and resin to move when using your heat gun. No mess, no fuss!
Create Your Resin Ocean Waves
Now you can add your white resin and create your waves and lacing. Because you’re working with a much smaller piece compared to a cheese board, you need to be mindful when using your heat gun.
Even though your mold is only filled halfway with resin, you must be careful, as the heat gun could still blow some of the resin over and out of the mold.
You need to constantly move the heat gun and only hold it in one spot for a maximum of one to two seconds. Change the angle as well – so blow straight on, then move to the side and blow on an angle.
Refer to “The Easiest Way to Get Resin Lacing” in Step 2 above for a detailed explanation of this process.
The Top Coat
You need to add a top coat of clear resin to your piece, and you can do this 24 hours after you do the initial pour. Remember, we only filled the mold halfway, so we need to fill the rest of it with clear resin. Mix some resin, pour it into your mold, and ensure it reaches the top. If there are any bubbles, you can remove them with a torch.
Tip: Don’t remove the coaster or bookmaker from the mold before adding the top coat. Don’t even pull at the sides of the mold. Leave it as is. Only remove it after the top coat has cured.
Doing so makes adding the top coat easier, as the mold still keeps your resin in its original shape. Also, not pulling at the mold’s sides will prevent any resin from dripping down the side of your piece. The bottom line is that your coaster or bookmark will hold its original shape without effort.
Once a top coat is added to a piece that has been removed from its mold, there will most likely be dripping down the sides, which looks messy and can only be removed by sanding.
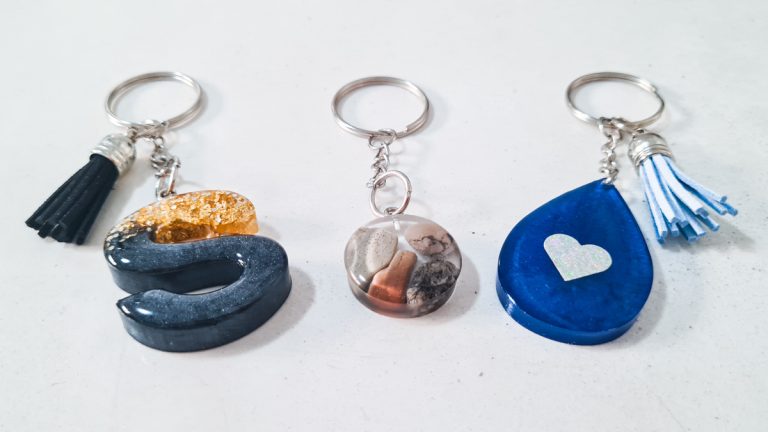
Cure and De-mold
And that’s a wrap! Now all that’s left is for your resin to cure. This usually takes 24-72 hours; after that, you can de-mold and stare at the beauty of your first resin ocean art piece!
Tip: Spray your mold with a release agent. This protects your mold and increases its life span. We recommend Ease Release 200 (Paid Link).
Final Thoughts
Remember, you’re an artist. Let things flow.
Keep working on your art. Try new techniques. Let your creative side run wild.
If your project didn’t turn out exactly as you imagined, give it another go.
Learning is also an art; once you’ve mastered it, you’ll have a skill that’ll be yours forever.
If you enjoyed reading this article or learned something new, please leave a comment below and share this article with your friends and fellow artists.