How to Make Silicone Molds for Resin
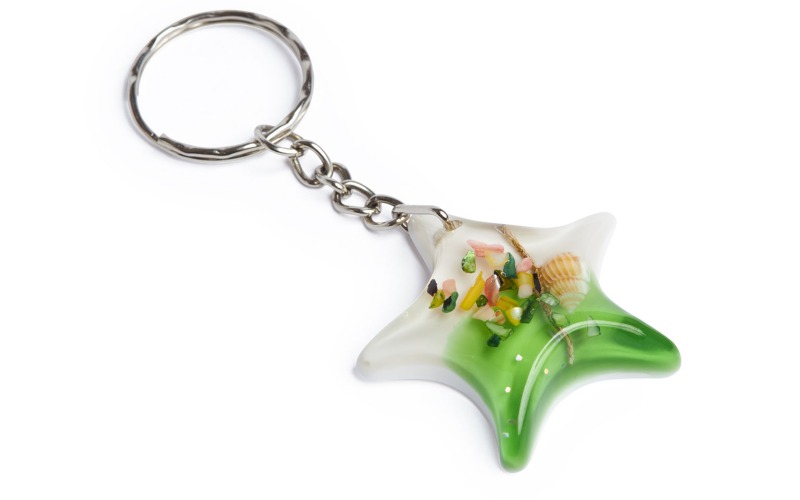
There are so many silicone molds available for you to buy – in different shapes and sizes – but what if none of them are what you’re looking for? What if you have a specific, special, or unique design in mind?
If you want custom silicone molds for resin, then you should take a swing at making them yourself.
And we’re here to help you!
Doing anything you’ve never done before could seem a little daunting, difficult, or maybe impossible. We’re here to set the record straight. Making a silicone mold by yourself is easier than you think.
You need the proper materials, a positive mindset, and this beginner-friendly guide. Let’s do this!
Let’s Cover the Basics
Before we get into the nitty-gritty of making a mold, we need to cover some basics. These include:
- What are resin molds?
- What objects can you use to create your molds?
- Why is silicone the best material for your epoxy resin molds?
- Useful mold-making terminology
What Is a Resin Mold, Anyway?
In the world of resin, a mold is what you would cast your resin into. It’s what will shape your project.
Now, in some instances, you need an object from which to create your mold (in other cases, you do not, but we’ll cover this later on). This object is called the positive model – we’ll also refer to it as your “blank” in this article.
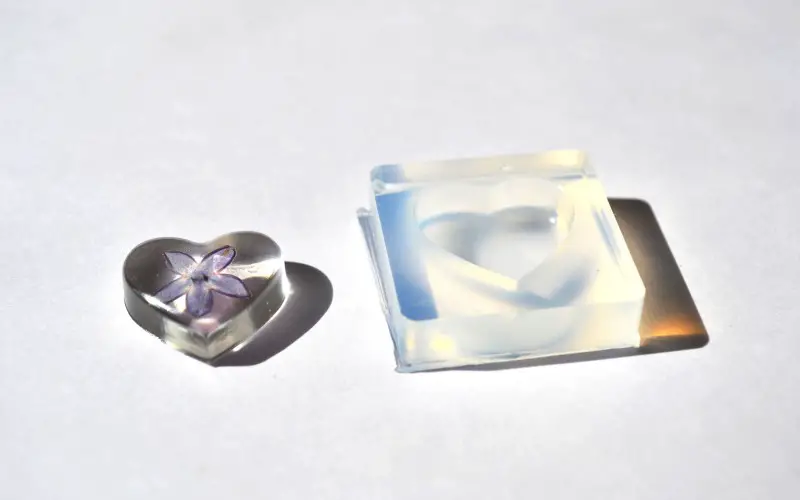
The mold that you create from your blank is called the negative impression. Think about the negative of a photograph – it’s a similar concept.
When using this method of creating a negative impression, your main aim is to recreate an object (your blank) in every detail so that it replicates the original object as closely as possible.
It will take practice to achieve this detail and create good quality, long-lasting molds. So it’s best to start simple and work your way up to the expert level of making custom resin molds.
What Objects Can Be Used to Create Molds?
Well, you can use anything to create custom resin molds, depending on your imagination, skill level, and the project you have in mind.
Here are some options you can use as your positive model:
- Toys
- Plates or bowls or trays
- Sculptures
- Fossils
- Photo frames
- Jars or bottles
- Dominoes
- Planters
- Objects such as cubes or spheres
The one thing that we would advise against using, is anything made from resin or sulfur clay. This is because the silicone mold-making mixture will react to the resin and sulfur clay, causing the silicone not to cure properly. This is what we call cure inhibition and would result in two things:
- A mold that you cannot use for its intended purpose as it will not replicate the details of your blank.
- Less money in your wallet – and that’s not a good thing any day of the week!

Silicone – Why It’s the Best Material for Epoxy Resin Molds
People have been creating molds for centuries, some dating back to ancient Egypt and China. The types of materials used have also varied. These include wax, glue, sand, animal fat, gypsum, metal, plastic, and others.
But when it comes to the best material for epoxy resin molds, silicone is your best bet. Let’s explain why:
- It’s a simple two-part mixture, and if you’ve been mixing resin for a while, this will be like second nature.
- Silicone is available in a hardness range from very soft to medium, which is ideal for resin projects as you can easily de-mold your project.
- Compared to all other rubber molds, silicone has the best release properties, which is a massive advantage for resin castings.
- This also means that it does not require a release agent. However, we advise that you use a mold release agent, as this will help increase the lifespan of your mold.
- Silicone has excellent chemical resistance as well as a high-temperature resistance. This is especially useful when working with resin because a chemical reaction occurs when the resin and hardener mix, giving off heat. Your silicone mold will be able to withstand both of these.
Useful Mold Making Terminology
In all walks of life, there are certain words that, when you understand them, make your life a little bit easier. These words will help you when reading instructions or data sheets or perhaps when you’re trying to explain what type of silicone you need for your project when speaking to the guy at your local art supply store.
We’d like you to understand five terms and keep them in mind:
- Pot life: This is how long you have to mix and apply/use/pour your silicone before it starts to cure and becomes unworkable.
- Mix ratio: This refers to the correct proportion needed for part A and part B before combining and mixing the two. This will either be by weight (grams) or volume (milliliters).
- Viscosity: This refers to how thick a liquid is and how easily it will or will not flow. The easier the silicone flows, the more detail you’ll be able to achieve from your mold. Its unit of measurement is centipoises (CPS). Example:
| Water | 1 CPS (flows easily) |
| Motor oil | 200 CPS |
| Honey | 3000 CPS |
| Peanut butter | 250 000 CPS |
| Window putty | 100 000 000 CPS |
- Durometer: This refers to the instrument and the standard method used to measure the hardness of materials such as rubber or plastic. A soft to medium silicone works best for resin art as you can demold easily.
- Demould/cure time: This refers to the time it takes for a material to set – before you can remove it from its mold or use it.
Now let’s move on to the exciting part!
How To Make Silicone Molds for Resin
Ok, we’ve arrived and are ready to do this!
Let’s look at what you’ll need, what you need to prepare, and how to go about it.
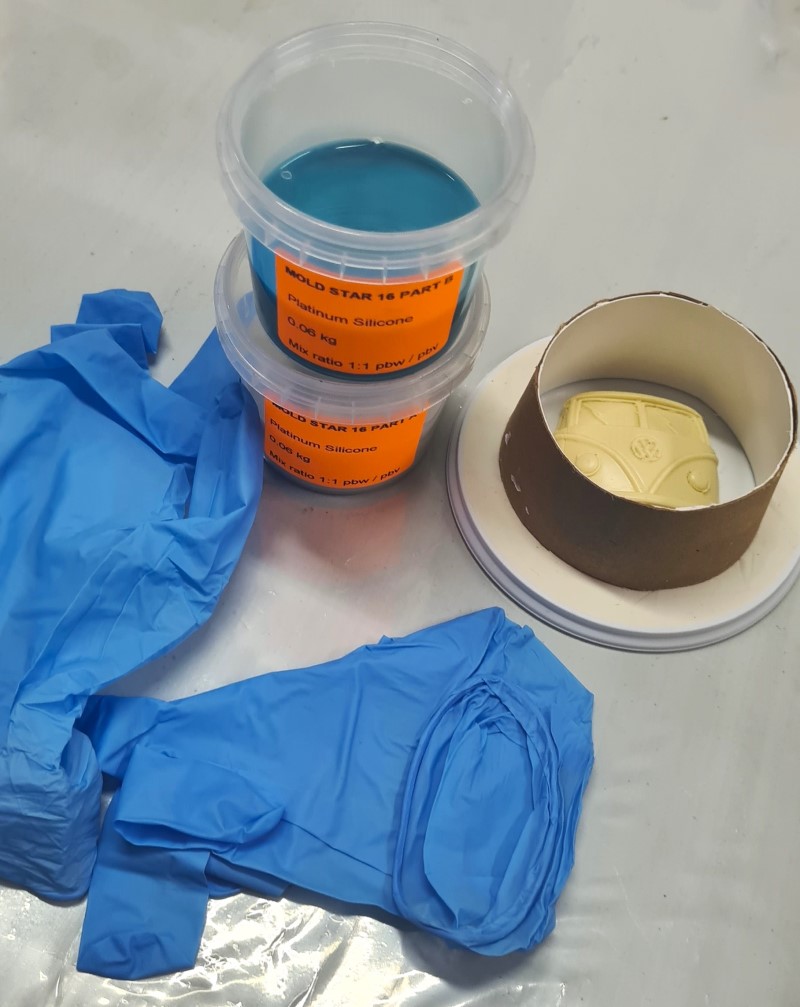
What You’ll Need to Make a Silicone Mold
Remember, we’re still in beginner mode. So we’re going to keep it simple with a one-piece mold. Let’s use a coaster as our example.
You might find most of these items around your house. If not, click on the links below to get them from Amazon – they also have some excellent silicone mold-making kit options for you.
Here’s what you’ll need:
- A coaster
- A container/holder or modeling clay
- A scale
- Mixing cups
- Stirring sticks
- Release agent
- Silicone mold-making material. Here are two great options:
*Paid Links
Now that we have our supplies, we can move on to the preparation phase.
Preparing the Framework
As this heading suggests – you need a frame. And you might be asking yourself why.
Well, the silicone mixture is pourable and will spread across your work surface if it’s not contained. The purpose of the frame is to keep the silicone mixture in place while your silicone mold cures.
Now your frame could be:
- A plastic or metal container
- A box
- A boxed frame made from perspex or MDF
- A border made of modeling clay
For our example, with the coaster, you could use a small cereal box, coffee can, cake tin, or an old lunch box. Make sure it’s a bit bigger and higher than your coaster, by at least half an inch or ten millimeters.
If you’re going to build your frame, then you need to ensure that it’s:
- Leakproof: Your silicone must not be able to leak through the bottom or sides of your frame. You can prevent this by sealing it with a hot glue gun or modeling clay.
- Solid: Your frame must not move or bend when pouring the silicone mixture into it. It must be able to withstand the pressure from the silicone and remain intact.
- The right size: Your blank must fit comfortably inside your frame and have a ten-millimeter border (width and height).
When your frame is ready, place your blank inside of it. The top of your blank must face upwards – you must be able to see it. Secure it to the bottom with a glue gun, caulk, or double-sided tape. Make sure it’s secure, cannot move, and that silicone cannot leak underneath it.
TIP: Make sure your surface and frame are nice and level, so your mold is level when it cures.
Apply the Release Agent
The purpose of the release agent is to allow your blank to be released easily and without much effort from the mold, you’re going to make.
The proper way to apply it is by:
- Spraying a light mist onto your blank and the inside of your frame.
- Use a small, clean paintbrush to ensure that the release agent has evenly coated the surfaces.
- Then apply a second coat – a light mist as well – and let it dry for 10 minutes.
TIP: Don’t use too much release agent. This will cause little air bubbles, which will then transfer to your mold and anything you then create from that mold.
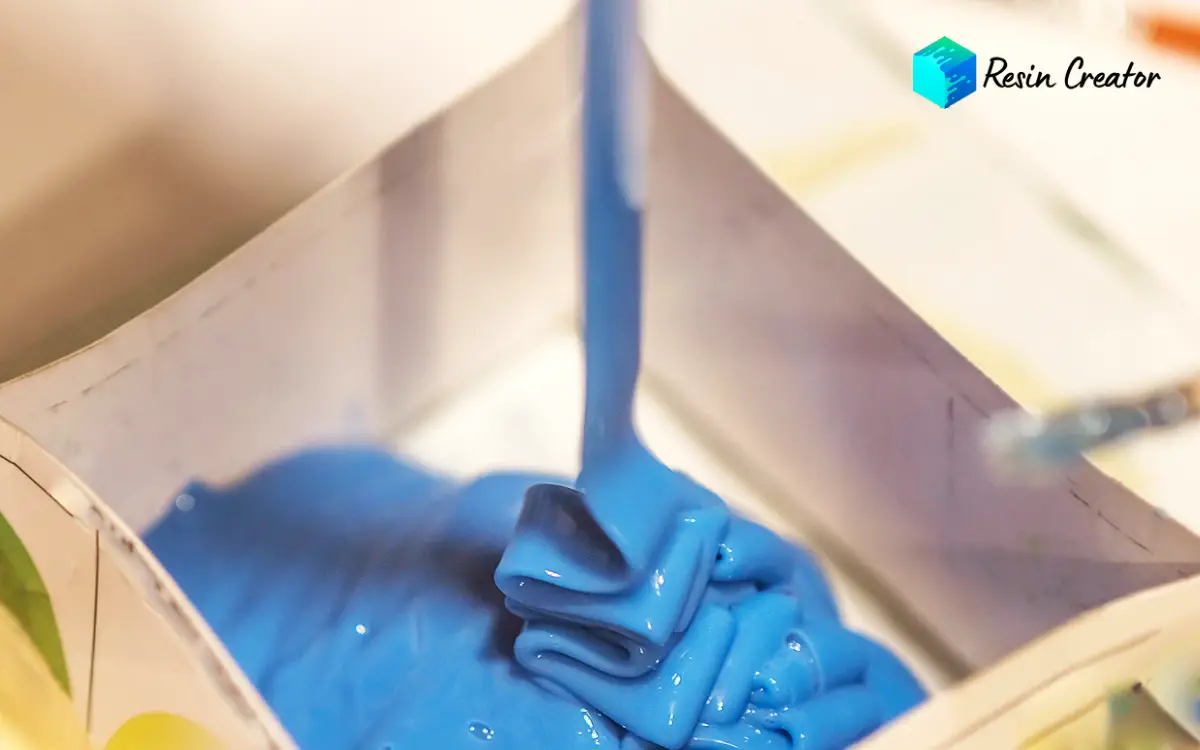
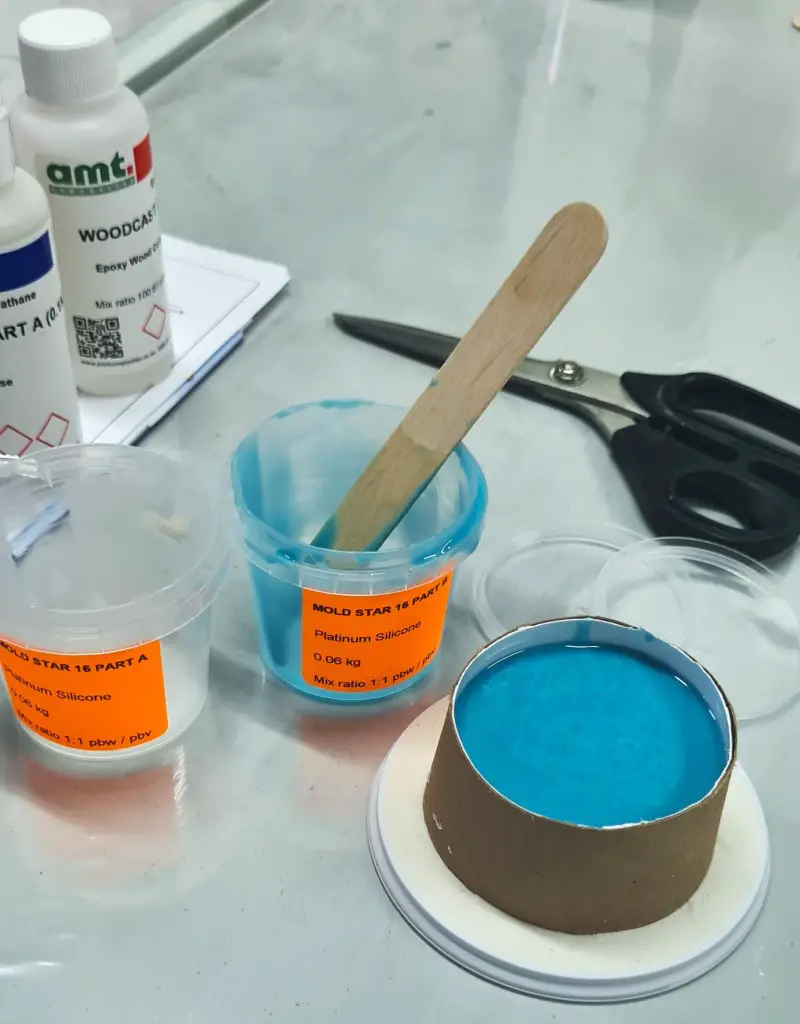
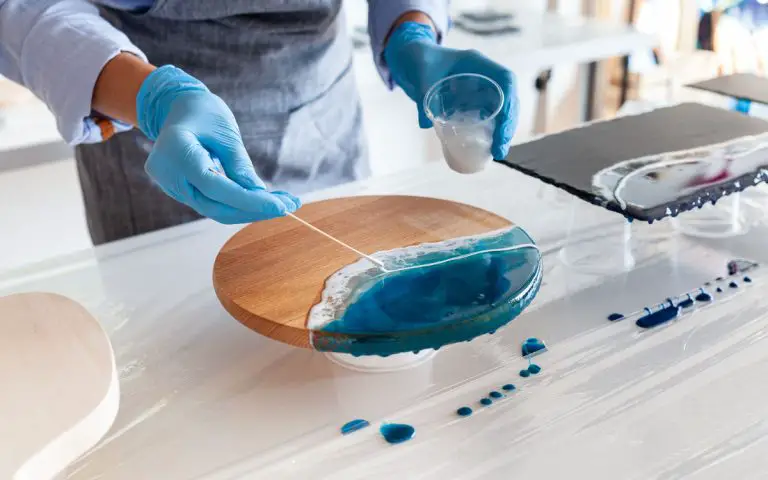
Mix the Silicone
First, read the measuring and mixing instructions for the silicone you purchased. Measure parts A and B as accurately as possible and in separate containers.
Once you have part A and part B measured, it is highly recommended that you pre-mix them before combining them. This will allow for any parts that have settled to the bottom to be mixed through, resulting in a mold that will cure properly.
At this point, you need to be fully aware of your silicone’s pot life and cure time. Set a stopwatch or keep a clock nearby to help you keep track of your time.
Now combine part A and part B:
- Mix slowly and thoroughly.
- Mixing too fast will introduce air bubbles into your silicone mixture.
- Be sure to scrape the bottom of your container as well as all of the sides while you’re mixing.
TIP: If you’d like to color your mold, then the best time to do so is when you’re pre-mixing. Add the coloring to part A or part B. By doing so, you won’t waste any of your precious pot life or curing time.
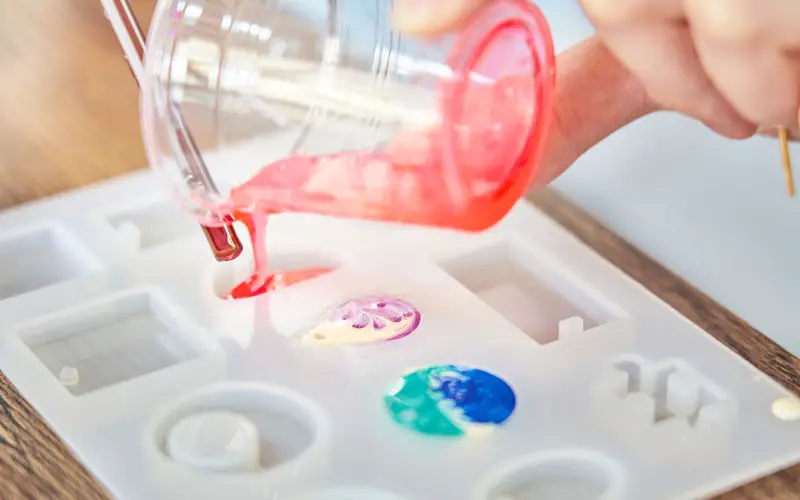
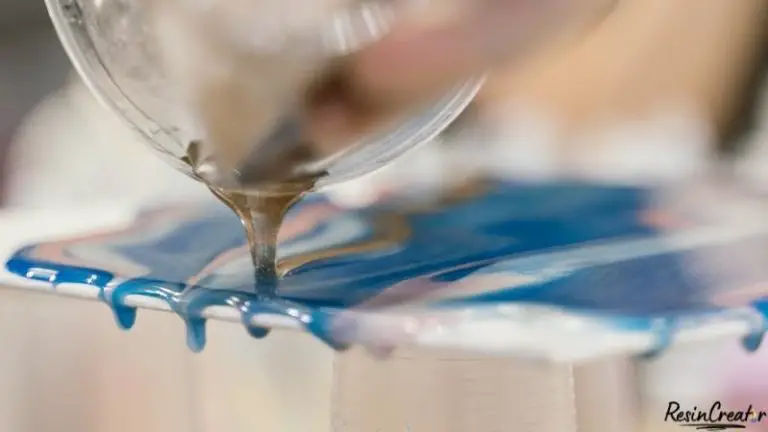
Pour the Silicone
Now, all you need is a steady hand!
- Your frame is ready.
- Your blank is in place.
- Your silicone is mixed.
- Start pouring!
Here are some tips for pouring like a pro:
- Pour from a single spot – do not move the silicone around or pour over your blank.
- Start from the lowest point in your frame – allow the silicone to fill your frame and cover your blank as you pour.
- Keep your hand steady and the flow constant – this will help reduce air bubbles.
- If air bubbles appear on the surface, you can remove them with a heat gun.
And now, we practice patience by allowing the silicone to cure. The silicone generally takes 16 hours to cure, but some can cure within an hour.
You can gently press onto your mold with your finger to check if it has cured. If it feels firm, then it has cured. Please refer to the instructions for your silicone mix to be sure.
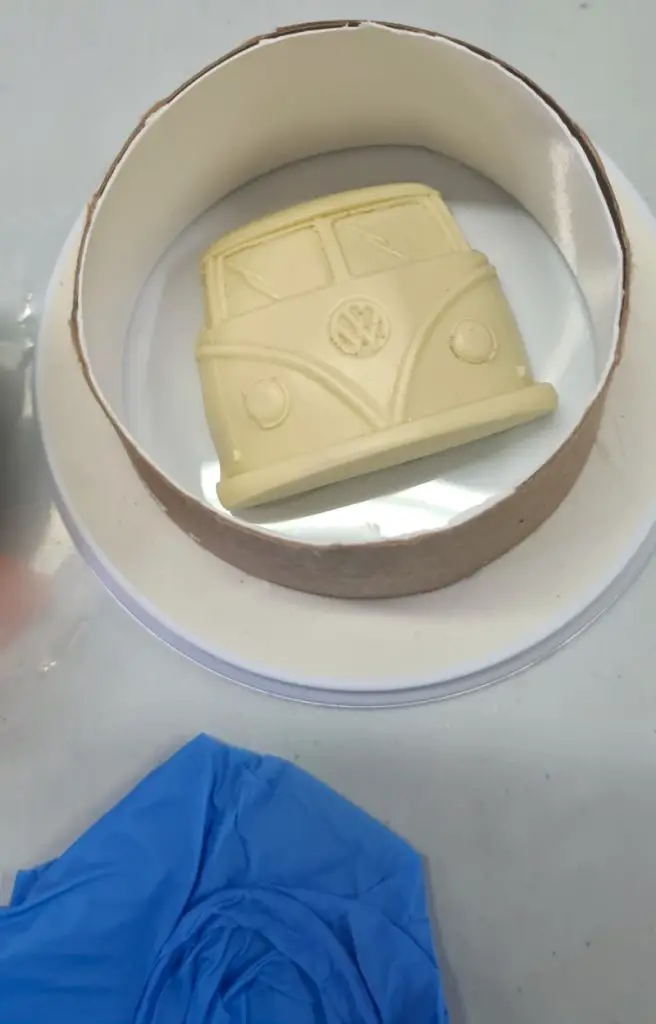
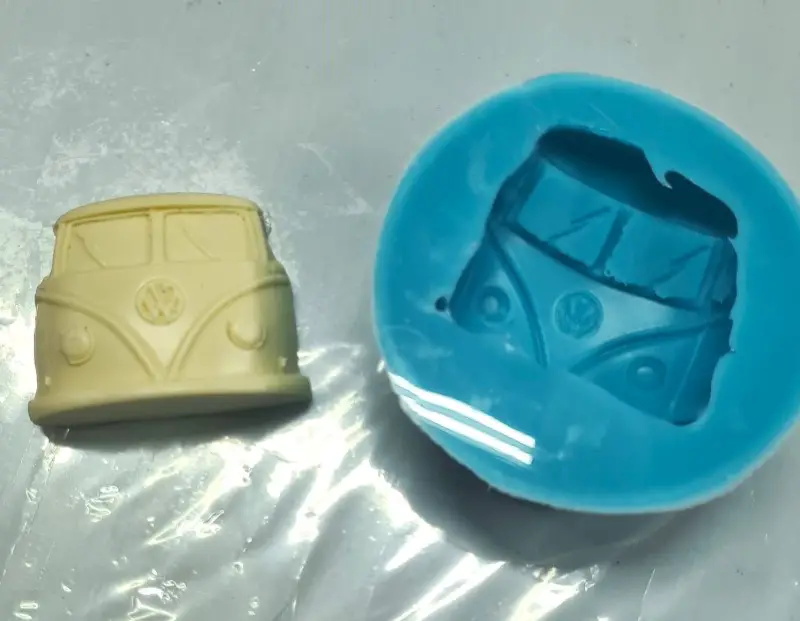
Demolding
For the final step, remove the negative impression you have created, AKA your new silicone mold!
Your mold should come off quite easily. There might be a little suction, but your blank should come apart from your negative impression without much effort:
- If you used a container as your frame, you could gently pull at its sides to loosen your mold. You can then flip the container over to pop your mold out.
- If you built a frame, you need to take the frame apart to release your mold.
Well done! You’ve created your first silicone mold, and you can now create your very own unique resin designs that are truly one of a kind!
TIP: To increase the lifespan of your new mold, you can bake it in an oven for four to six hours at 150 degrees Fahrenheit or 66 degrees Celsius. Let it cool down completely before using it.
How To Make a Silicone Mold Without Using an Object
As promised, we’ll now cover the instances in which you do not need an object (positive model or blank).
This option is useful when you want to create a sort of free-style, flat project. Like a small tabletop, a mismatched set of coasters, or a unique tray.
And this option is quite simple.
What You Need
- Ready to use silicone in a tube
- A silicone mat
*Paid Links
No positive mold.
No release agent.
No frame.
No mixing.
Sounds good, right? Too good to be true? Not this time!
What You Need to Do
- Place your silicone mat on a flat, level surface.
- Squeeze the silicone from the tube onto the silicone mat, creating any shape you prefer – only the outline of the shape, the silicone mat serves as your base.
- Let the silicone dry.
And your mold is ready to be used! Just pour your resin in.
Troubleshooting – What if My Silicone Mold Hasn’t Cured Properly?
Don’t worry. We’re here to help you figure it out.
Let’s look at three scenarios and what could have possibly happened.
If It Did Not Cure at All
- Mix ratio. Instead of weight, you might have measured it in volume. Check the instructions on the packaging to be sure.
- Faulty scale. Check that the scale you used weighs accurately and that the unit is grams.
- Temperature. The room you worked in might have been too hot or too cold. Check the ideal temperature on the instructions.
- Expiration date. Check that your silicone mix has not passed its expiry date.
If It Only Cured Partially
- Not mixed through properly. Ensure that you pre-mix and that once combined, you mix for the correct amount of time and scrape the bottom and sides of your mixing container.
- Inaccurate measurements. Be sure that your measurements are accurate in volume or weight.
Positive Mold Stuck To Negative Impression
- Incorrect release agent. Check that your release agent is compatible with silicone molds.
- Not enough release agent. The release agent did not coat the blank evenly.
Final Thoughts
Anyone can choose convenience and buy silicone molds, but only a select few will experience the satisfaction of making their own.
Yes, you might encounter some bumps along the way, but those bumps are your experience which will serve you on your next attempt.
Remember, start small, start simple, and then grow from there.
We hope you enjoyed this article and will share it with your fellow mold-making enthusiasts.


It’s nearly impossible to find well-informed people on this topic, however, you sound like you know what you’re talking about! Thanks