Resin Art Supplies – Everything you need!
If you are a newbie to resin art and feel lost and overwhelmed with all the do’s and don’ts of the craft, don’t fret! We are here to help. If you need to know where to start or which supplies you’ll need, then you’ve come to the right place.
This post was specifically created to help resin newbies like yourself find their way into the massive pool of resin tools, supplies, and brands. We’ll list and explain every piece of resin craft supply you might need to succeed in your resin art or crafting project.
We’ll discuss the must-have resin tools and show you some nice-to-have tools that will make your resin art experience more enjoyable and save you time, effort, and money. It is essential to use the correct tool for the job. It will not only make your life easier, but it will also allow you to get the desired aesthetic that you are after.
We advise starting with some beginner-friendly resin art supplies and then upgrading as your skills develop. Experimenting with different resin types and brands is part of the experience and will help you determine what you like to work with.
If you’re wondering where to buy resin supplies, don’t worry. They’re easy to find online or at your local hardware shop. So let’s look at the essential epoxy resin art supplies you need to get started.
Resin Art Supplies for Beginners
Although there are various ways to make resin art, this section will focus on the main supplies you’ll need to make your artwork. Some supplies are essential, while others are more advanced and could be helpful to bring flair to your art design. To create your resin piece, you’ll need the following:
Resin Art Shopping List
We have put together these lists that include links to the sections on this page so you can easily find what you are looking for.
There is also a link on the right to our top pick of that product if you just want to go ahead and buy everything you need to start making resin art.
| Required Equipment | More Information | Buy Now |
|---|---|---|
| Resin | Resin for Art | Amazon *Paid Link |
| Paper towels | Amazon *Paid Link | |
| Stirring sticks and measuring/mixing cups | Amazon *Paid Link | |
| Blocks or stands to support your artwork | Amazon *Paid Link | |
| A Level | Amazon *Paid Link | |
| Nitrile gloves | Safety Equipment | Amazon *Paid Link |
| A respirator mask | Safety Equipment | Amazon *Paid Link |
| Plastic drop sheets | Amazon *Paid Link | |
| Dust cover | Amazon *Paid Link |
| Nice to have | More Information | Buy Now |
|---|---|---|
| Heat gun | Heat Guns | Amazon *Paid Link |
| Blowtorch | Blow torches | Amazon *Paid Link |
| Isopropyl alcohol (70% or higher) | Amazon *Paid Link | |
| Spreading tools | Amazon *Paid Link | |
| Sander | Sanding Resin | Amazon *Paid Link |
| Polisher | Polishing Resin | Amazon *Paid Link |
| Optional | More Information | Buy Now |
|---|---|---|
| Resin Colors and Pigments | Coloring Resin | Amazon *Paid Link |
| Masking tape | Amazon *Paid Link | |
| Inclusions | Resin Flowers | Amazon *Paid Link |
| Silicone Molds | Make Silicone Molds | Amazon *Paid Link |
Resin
If you are unaware of this, it might shock you that only some of the resins used for crafting are the same. Different resins are used for various purposes. Choosing the best resin is essential if you want the best results for your resin art project.
The most common type of resin used for making resin art is called epoxy resin. Epoxy resin is mixed with hardener to form a solid material. It is usually applied layer-by-layer, allowing each layer to dry before applying the next.
Casting resin is an epoxy resin with a very low viscosity. This type of resin is suitable to use with resin molds; the fluidity of the resin ensures that the resin gets evenly distributed and fills even the tiniest gaps.
Coating resin, on the other hand, is another type of epoxy resin with a higher viscosity. As the name suggests, this resin type is typically used as a coating layer and applied in thin layers.
Coating resin is usually more complicated than casting resin because it should be able to withstand more severe knocks. Casting resin can be applied in thicker layers and takes longer to dry.
There are also other types of craft resin on the market, like UV resin, polyurethane resin, and polyester resin. Each of these resins has its applications. For example, UV resins are known for their fast curing times and only consist of one component.
This type of resin is cured with a UV light source like a UV lamp or the sun. While this resin can be handy for small, manageable projects, epoxy resin is more durable.
Polyurethane resin is a highly robust material that may be used to make several objects, including casting molds. When heat is applied to set polyurethane resin, it hardens and becomes highly durable and robust.
Polyester resin is not popular for crafts; instead, it is used for other larger projects. Polyester resin can create models similar to epoxy resin, although it is most frequently utilized to create ponds and swimming pools and to construct boats. The resin is robust and water-resistant, and it has a fiber structure.
Our Suggestion – Resin for Art
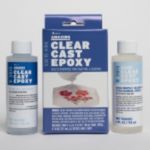
Amazing Clear Cast Epoxy is perfect for any beginner or experienced artist. It’s easy to use and dries super clear.
*Paid Links
There are a lot of reputable resin brands out there, and if you still need to read our article on the best resin for arts and crafts.
Plastic Resin Tools
We advise using plastic equipment when working with resin for a reason—epoxy resin doesn’t bond to plastic, which makes cleanup simple (and who doesn’t appreciate simple cleanup?)—this counts for stir sticks to spreaders to plastic drop sheets.
It’s essential to have the appropriate equipment for the job, but it’s also critical that your resin tools are dry and clean. Dirty tools can contaminate resin with dust, pieces of previously cured resin, and even solvents or oily substances, preventing the resin from curing properly.
Whereas water can result in a murky resin cure. This is why it is essential to ensure your work area, measuring cups, tools, and the object you’re resining are completely dry and clean.
When it comes to cleaning plastic resin equipment, you have two options:
- Isopropyl alcohol should be sprayed on damp tools before using paper towels to dry them. To altogether remove the resin, repeat this procedure as often as necessary. When all resin residue has been removed, wash the tools in hot, soapy water and let them dry completely before using them again.
- Lay wet tools on a plastic surface overnight to cure the resin. The resin will easily come off the following day.
In either case, plastic tools are a wise choice for dealing with resin because they can be used repeatedly.
> Spreading Tools
Different spreading tools can be used depending on how much resin needs to be distributed around and the desired effect.
We advise using items like reusable plastic spatulas whenever possible. Once the resin is in the desired location, all that is left to do is clean the plastic with a piece of kitchen paper before wiping it off with isopropyl alcohol. Then, you can use it the following time without worrying about resin residue.
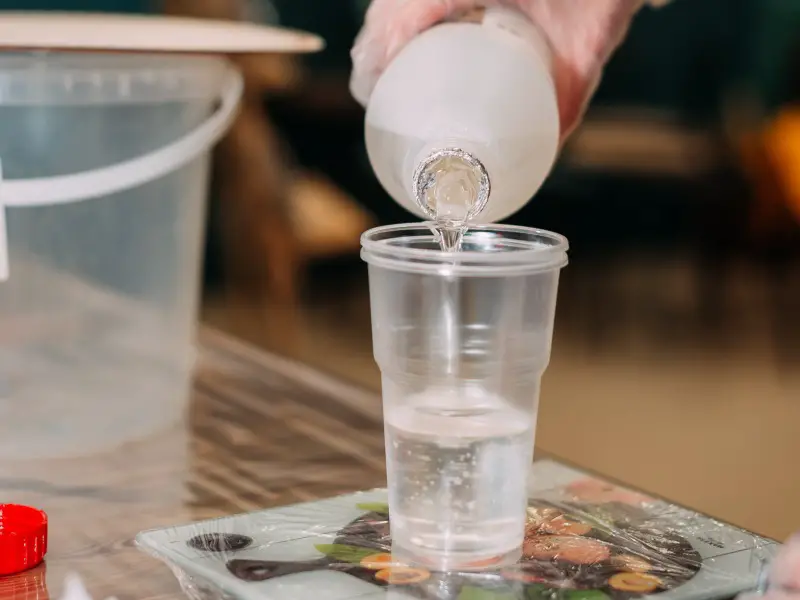
> Stirring Sticks and Measuring/Mixing Cups
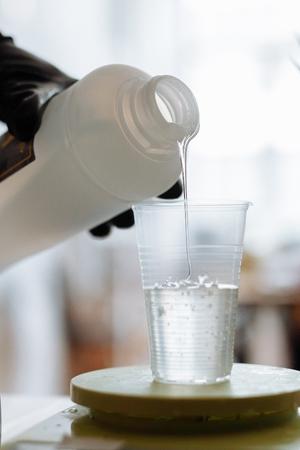
Use a plastic, graduated measuring jug to correctly measure and mix your resin because poorly measured resin and hardener won’t cure. This makes it crucial to use a cup with clearly delineated lines to prevent guesstimating.
As long as you use the correct mixing ratios (specified in the product instructions), it doesn’t matter whether you measure the resin or the hardener first.
Pick a plastic mixing cup, and when you’re done, flip it over onto a surface covered in plastic to allow the resin to settle. Once the resin has dried the following day, you can peel it off and reuse your cup.
You will require additional mixing cups to make colored resin art. The number of mixing cups you’ll need will depend on how many colors you intend to use. While some individuals choose recyclable disposable cups, others like sturdy plastic cups with multiple uses that can be cleaned and reused.
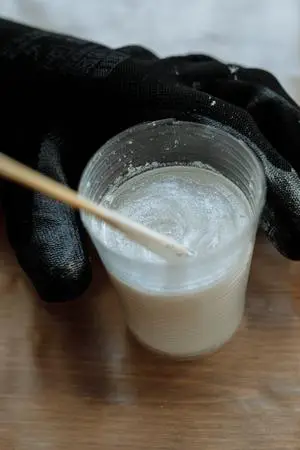
Additionally, stir sticks are required. The best stirring tool for resin has a flat surface; improperly mixed resin won’t cure properly, so be sure to scrape the sides and bottom of the container while you stir to ensure that all of the resin and hardener are well mixed.
Unlike something spherical, like a spoon, a stir stick with a flat side can scrape the container considerably more effectively. In addition, the larger surface area of a flat stirrer will enable faster and more efficient stirring.
Tongue depressors made of wood or craft sticks can be used, but they must be thrown away after each usage. Again, the number of stirring sticks will depend on how many colors you plan to incorporate into your piece. It’s important to use one stirring stick per color to avoid murky colors and to ensure that the colors are crisp, clear, and vibrant.
Recommended – Silicone Measuring Cups and Mixing Sticks
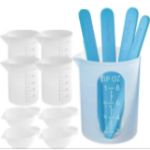
These are great for anyone doing resin art, they are easy to clean and will last you a long time. There are also a number of them in the kit so you can mix up many colors at once for more complex projects.
*Paid Links
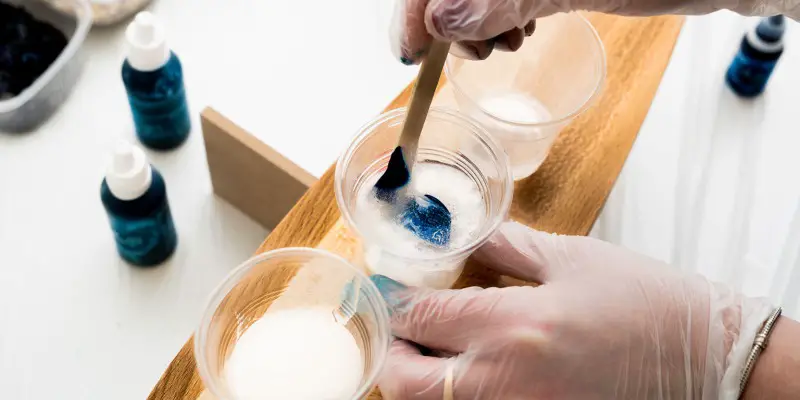
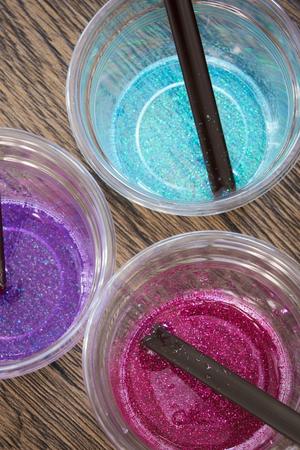
If your resin art project calls for colored resin, mix it using clear plastic drinking glasses and popsicle sticks as follows:
- The resin needed for your project should be combined in one large batch.
- Depending on how much resin you need for each color, portion it into separate cups. Then, for each color or hue, use a different cup.
- Drop the tint into the resin and thoroughly blend it until it has a single, unified color. Of course, you can always add additional color.
- Pulling a small amount of tinted resin up the side of the plastic cup will allow you to gauge the color’s depth; if more tint is required, add it now.
Resin should be divided into separate plastic cups, one for each hue.
> Plastic Drop Sheets
Use a plastic drop sheet to shield your work surface and floor from resin spills or drips. Resin drips can be cleaned with paper towels and isopropyl alcohol, or if allowed to dry, they can be scraped off the following day.
A clear, smooth vinyl shower curtain offers a cheap, durable liner that can be used repeatedly. Alternatively, kitchen parchment paper is ideal for smaller jobs.
> Isopropyl Alcohol and Paper Towels
The two most important materials for spill cleanup are paper towels and isopropyl alcohol. While wearing gloves, wipe as much wet resin off with paper towels first, then spritz your equipment with alcohol to eliminate any leftover residue. Repeat this procedure until there is no residue, then wipe dry with a paper towel.
Paper towels and alcohol can also be used to remove any excess resin left inside your measuring cups once you are done creating your masterpiece.
Resin should never go down the drain. When all resin residue has been removed from your instruments, wash them in hot, soapy water and let them dry completely before using them again.
TIP: Since alcohol degrades resin, you should avoid using it to remove resin from your hands because your skin can absorb it.
Safety Equipment
When working with resin, wearing protective gear such as gloves, goggles, aprons, and masks is always essential. If you’d like to learn more about resin safety, you can read more about it here.
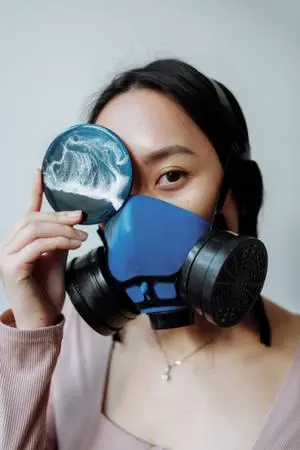
> Respirator
Because resin can release some potent and toxic gasses, many resin brands require that you wear a respirator. However, with new advancing technology, some resin brands now use formulas that leave no VOCs or toxic fumes that can become airborne and breathed in.
For some brands, it might not be necessary to wear a respirator. However, it’s essential not to assume anything and to refer to the manufacturer’s instruction manual. If a respirator is required, get one and wear it for your health and safety.
Our Pick – Respirator for Resin Art
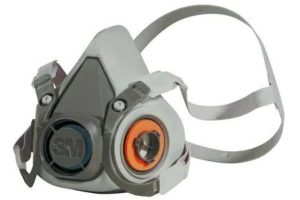
This is a requirement for anyone that will be working with resin. Don’t be tempted to work with resin unless you take the correct safety precautions.
*Paid Links
3M P100 Respirator Cartridge/Filters
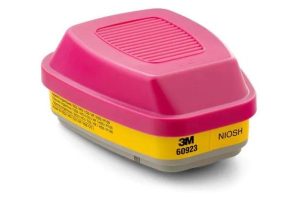
To go with the Respirator you will need some of these filters as these are the correct ones to use with resin.
*Paid Links
> Goggles
It is always advised to use safety goggles when working with resin, especially when pouring large quantities of resin or sanding a piece.
> Gloves
We recommend wearing protective gloves when applying art resin to avoid getting it on your hands. Resin can be sticky and hard to remove, and you can avoid extra trouble with gloves.
We suggest nitrile ones if you don’t want to wear latex gloves. They’re much safer and less likely to cause allergic reactions. However, we recommend having a few pairs when working with resin.
> Old Clothes or An Apron
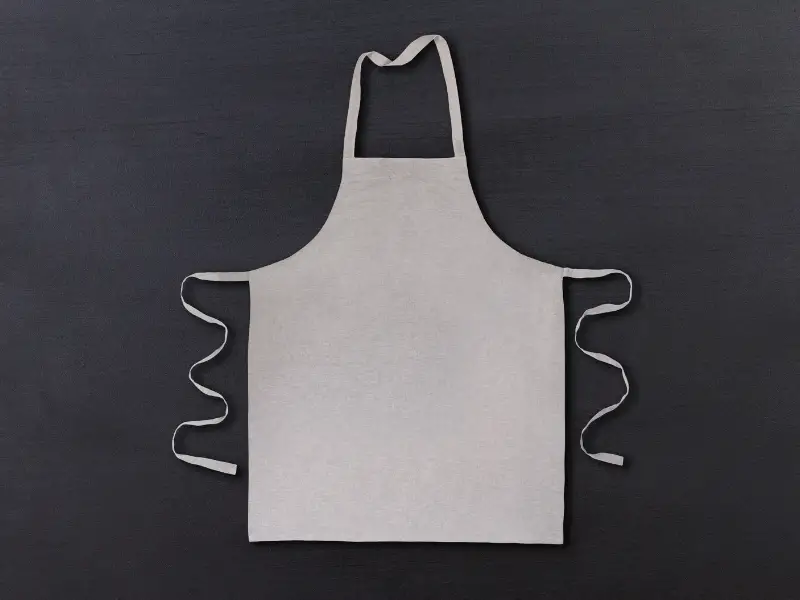
Resin drips are hard to avoid, especially when working with large pieces. Unfortunately, the resin is also hard to remove, so it’s best to avoid getting resin on anything other than the dedicated tools or art pieces you are working on.
You can protect yourself against resin dripping by wearing an apron or old clothes while working. This will help keep the resin off of your skin and clothing. If you have long hair, you can use a bun to keep the resin out of your hair and vice versa.
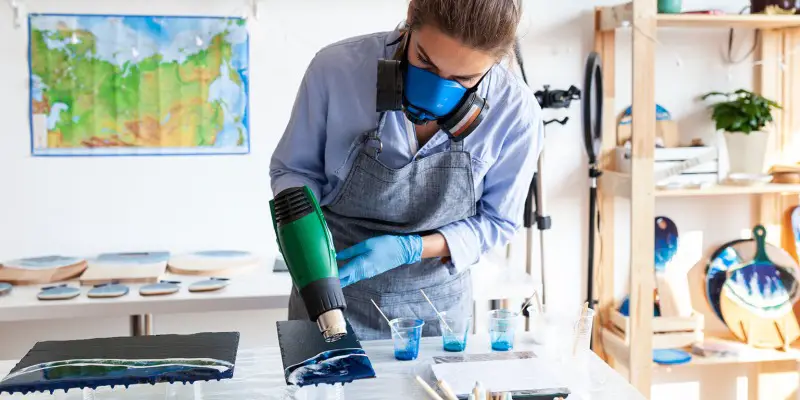
A Heat Gun
Numerous bubbles are produced when the resin is mixed; if not eliminated, these bubbles will cure into your artwork. Therefore, a heat gun is crucial if you want a smooth, transparent piece with little to no bubbles.
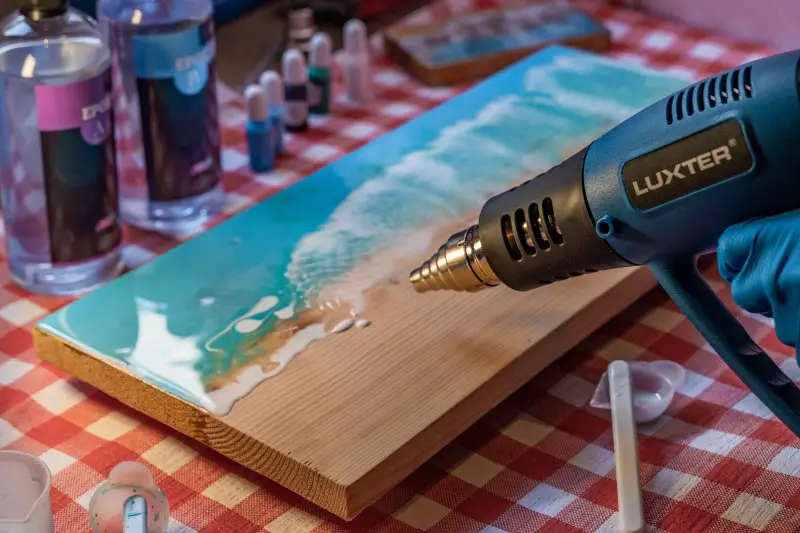
Other methods include manually bursting the bubbles with a toothpick. However, no matter how hard you try, the outcome will not be as clear as using a heat gun, and it would take a lot of time!
Hair dryers don’t heat up to a hot enough temperature, blowing your resin around and adding dust. When working with silicone molds or resin that contains alcohol ink, a heat gun is a suitable option.
Our Favorite – Heat Gun for Resin Art
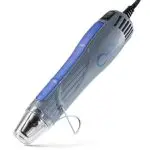
A very important tool for resin art is a heat gun. This one is our top pick because of its balance of cost and versatility.
*Paid Links
Nothing beats using a heat gun to remove bubbles from most resin work! If you want some more choices we have a list of the best heat guns for resin here.
Toothpicks
When resining, toothpicks are a necessity. After torching your item, hold it to the light at eye level to check for stray bubbles and fish out any hair or dust particles. They come in handy if you need to move tiny bits of resin or precisely position inclusions like gems, glitter, or gold flakes.

Dust Cover
After finishing your work, you must allow it to cure completely. While different brands will advise other times, most will often be dry in less than 72 hours. It would be best if you covered your work during this time to stop stray hairs, dust, or other contaminants from getting into your art piece.
It’s essential to have your dust cover ready before you start your resin project. You don’t want to leave your newly resined artwork while searching for a cardboard box or plastic tote.
Make sure to wipe the cover down to eliminate any dust that might fall onto your wet art. We prefer plastic totes since they are simple to clean. If you use a cardboard box, remove the flaps so it doesn’t fall into your artwork and harden with the piece.
You can even create a cover yourself out of some plastic sheeting and wooden batons. Just ensure that it is big enough to completely cover your art!
Masking Tape
Although it is not required, some people use masking or decorator tape to keep the sides or other regions of their board or canvas free from resin.
This depends on your personal preferences and the overall appearance you’re going for.
Suppose you want to resin the sides of your piece; tape off the bottom with high-quality painter’s tape. This will prevent drips from ruining your artwork.
Unfortunately, due to gravity, drops begin to build up around the bottom as resin drips down the sides. The tape will catch these drips, and after the resin is touchably dry, you can remove the tape and the drips together.
Our Favorite – Masking Tape
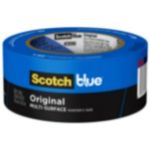
To make your life easier this tape is a great choice. It seals well as it’s meant for painting and it’s easy to remove with no residue left on your work.
*Paid Links
Level
It’s essential to have a flat surface when creating resin art pours! Since epoxy resin self-levels, if your item is tilted, it will run off the edges at the lowest point. To avoid this, ensure your artwork is perfectly horizontal. You can check this using any traditional level.
This also counts for pieces that don’t have a flat surface. Wood should be cut or sanded flat before it has resin put on it.
Plastic Container For Water Bath
If the resin you’re working with is cold, a warm water bath will reheat it to room temperature and make it easier to handle. Choose a narrow container with high sides to prevent the bottle from tipping.
The capped bottles should soak in the warm water for 10 to 15 minutes after it has been filled halfway, roughly as warm as you would use for a baby’s bath. Then, before opening the bottle, completely dry it off, and you’re ready to measure and mix.
Blocks or Stands to Support Your Artwork
Lifting it off the table is crucial if you plan to pour your work onto something flat, like a board. This is because the resin will eventually drop off the edges, and if your board is flat on your table, it will be difficult to remove.
To lift your piece from the table, we advise placing stands, blocks, or anything else of the same height and strength underneath. Extra resin can then collect on the plastic-lined work surface when plastic stands to support your item.
Nice To Have Tools
Once you’ve mastered the fundamentals, it’s time to spice things up a little. In this section, we’ll look at some nice-to-have tools for beginner resin crafters. This is where you’ll get to express your style and experiment with different looks. Mostly these tools have to do with aesthetics that you can add to your art to bring a bit of personality to the piece.
Here are some ideas or starting points for newbie resin crafters:
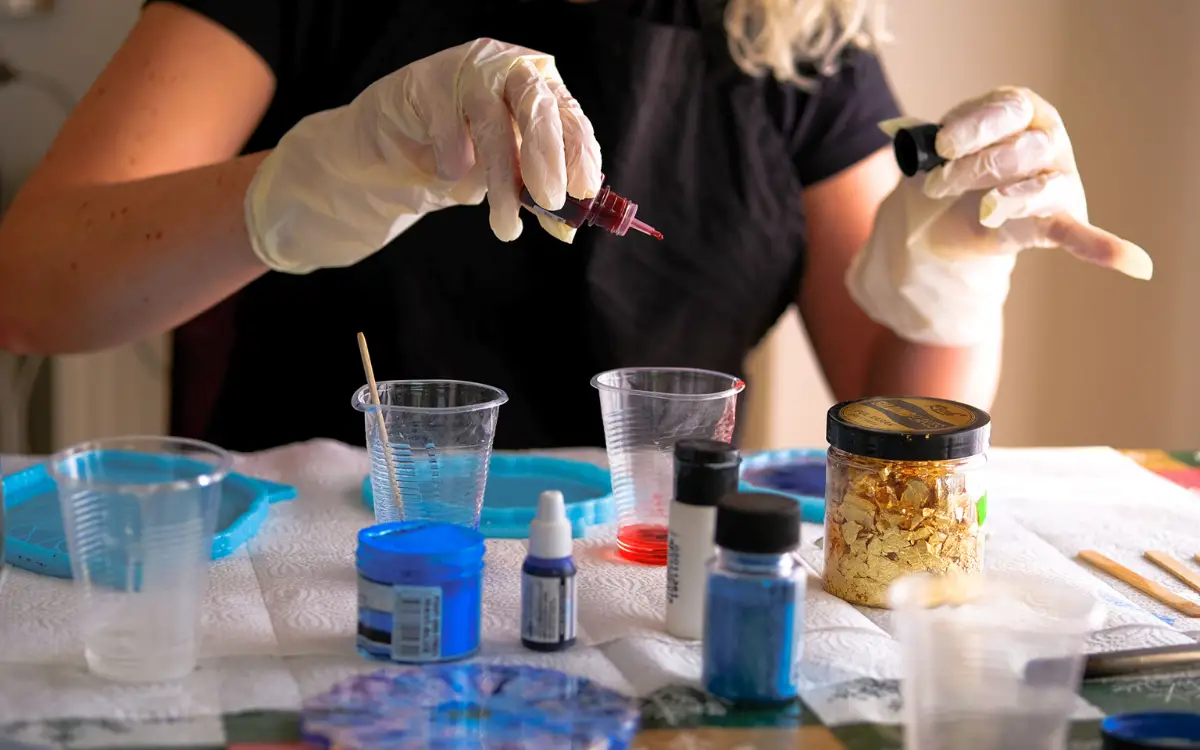
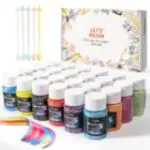
Pigments
> Liquid Pigments
There are numerous different brands of liquid pigments available. However, they are all created from various components, so before choosing the cheapest one, make sure you know what is in them.
This is crucial if you want to remove bubbles with an open flame since the pigments could react with the fire. Oil-based pigments are advised since they are not flammable like alcohol-based colorants.
We advise adding a few drops and carefully mixing your resin before determining whether you want to add more. It is essential to keep track of how much resin you are adding because anything over 6% can change the ratio of resin to hardener. This can prevent the resin from properly curing.
Our Favorite – Let’s Resin Pigment
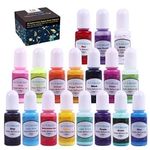
To make some beautiful resin art you will need some colors. These are a great start and can be used for many resin projects. They are completely compatible with resin and very easy to use.
*Paid Links
> Powdered Pigments
Mica powder is a highly pigmented coloring powder used in many products, including nail polish and cosmetics. It also works well in resin art and can add exquisite textures, color shifts, or even glitter to your creations.
As with liquid pigments, paying attention to how much you’re using is essential. Only add up to 6% of the total volume of mixed resin and hardener, or your resin may need to be adequately cured.
Our Favorite – Let’s Resin Mica Powder Kit
A very important tool for resin art is a heat gun. This one is our top pick because of its balance of cost and versatility.
*Paid Links
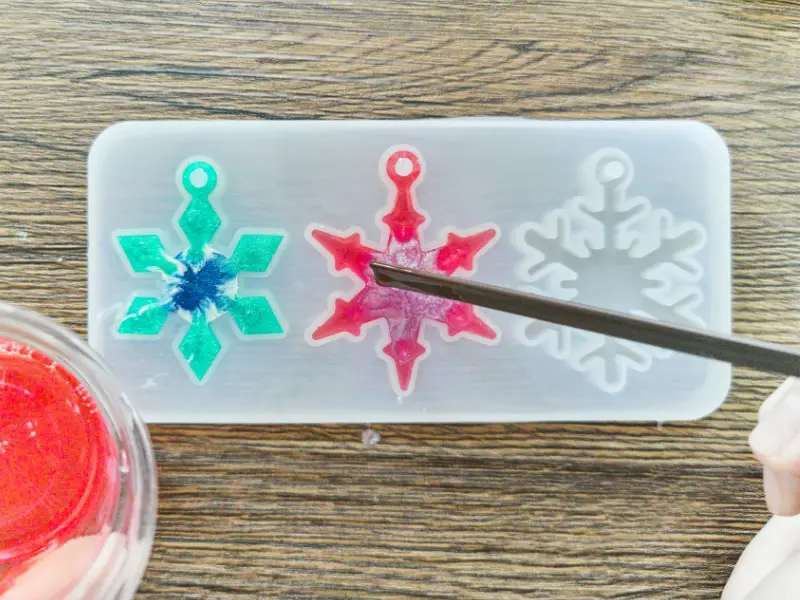
Alcohol Ink
Alcohol ink can be used to create some unique effects in your resin crafts. For example, you can create petri dish resin art with silicone molds and then create special effects like tendrils, squiggles, and other amazing effects; squeeze some alcohol ink drops into mixed epoxy resin in a silicone mold.
Please be aware that alcohol ink is flammable, so avoid using a torch when working with it. When alcohol ink is added, liquid art resin, which is not flammable on its own, becomes combustible. Most resin bubbles will usually pop due to the alcohol in the ink, but if you need an extra boost, use a heat gun.
Silicone Molds
Silicone molds are ideal for small resin art projects since they are flexible and easy to remove from the resin cast, unlike rigid plastic molds that could rip or distort. In addition, you can use it again and again because it returns to its original shape.
Molds come in almost every size and shape. In addition, you may include inclusions like beer caps, shells, colorful stones, gems, crystals, and more.
You can also create custom molds with mold-making material, a 2-part silicone substance that allows you to create unique molds.
Inclusions
“Inclusions” is just a fancy word for all the adorable little decorations you can add to your resin creation. Include gold leaf, crystals, decorative stones, charms, glitter, and other fun small embellishments in your work to add shine, personality, and texture.
You can suspend gold leaf flakes, add crushed glass or crystals to resemble geodes, add glitter for brightness and depth, or make coasters out of dried flowers, shells, beads, or bottle caps.
There are a million different items you can add to resin; always ensure your inclusions are completely dry. We recommend testing first to ensure you get the desired outcome. Inclusion is where you can be creative, and the sky is your limit. Try something unique and see if it works; if it doesn’t, then at least you know what to avoid.
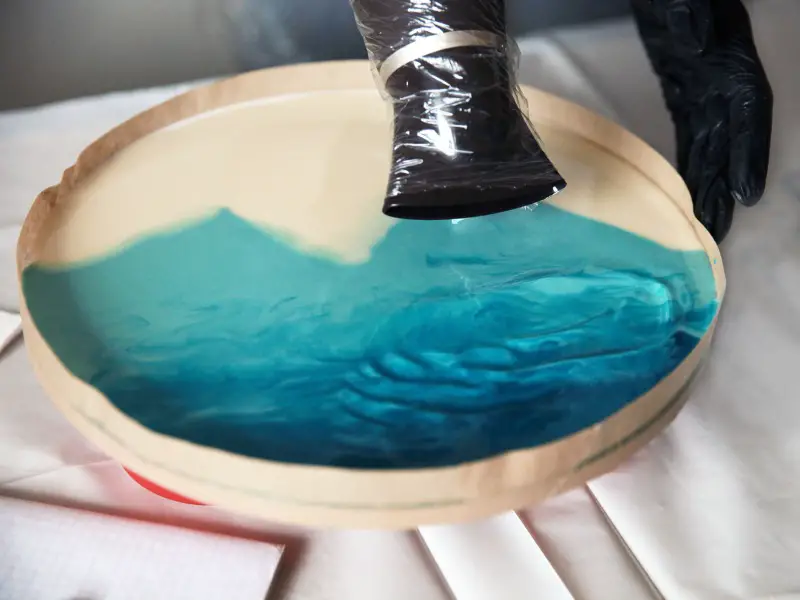
Metal Trays and Wood Panels
Epoxy resin is heavy and requires strong, sturdy support. For this reason, wood panels are a perfect choice when dealing with resin. For a contemporary aesthetic, you could mount prints, pictures, or even paint straight onto the wooden panel and cover it with resin.
When pouring colored resin for flow art or ocean art, cradled wood panels are an excellent choice since they have a lip to hold the resin in place. Metal serving trays are also a perfect choice in these cases.
A stretched canvas can also be resined, but the back needs to be strengthened with cardboard to prevent the cloth from sagging and causing the resin to cure in a pool in the middle.
Sandpaper
You might occasionally discover that your resin has hardened but still contains a bubble, some dust, or even hair. Don’t worry; this may be quickly repaired by applying a new resin coat. However, to prepare the initial coat so that the new resin has something to stick to, you must sand it down first.
Use coarse sandpaper, e.g., 80 grit, over the entire surface, whether you’re using a piece of sandpaper, a sanding block, or an electric sander. Pay special attention to sanding out the trouble spot.
It will appear to be a mess, but don’t be concerned. We advise utilizing stands, blocks, or anything else of the same height and strength underneath to keep your work securely supported. Then, after wiping away the sanding dust and applying your fresh coat, it will appear as good as new.
Hair Dryer or a Heat Gun
Use a hair dryer for flow art and a heat gun to help cure your resin faster. Here are some more tips to consider:
- When using alcohol ink, be aware that alcohol is flammable and that using a flame torch could result in a fire. In most cases, the alcohol in ink will dissolve many resin bubbles, but a heat gun is acceptable if you require more assistance.
- A heat gun is a valuable substitute for a flame torch when dealing with silicone molds because an open flame’s intensity risks destroying the mold.
- Use a low heat gun or hair dryer to gently push the layers of tinted resin to create cells and lace in flow art or ocean art. To quickly remove any bubbles, pass the heat gun over the surface.
FAQ
Which resin is suitable for beginners?
Stick with epoxy resin as it is the safest and easiest material to work with as a beginner. It is also the most robust resin and is unaffected by environmental factors.
The drawbacks of earlier resins were eliminated with the development of epoxy resin. The artwork becomes yellow over time when using alternative resins, a common issue. Epoxy resin is immune to yellowing since it is UV light resistant. As a result, using epoxy resin will give your artwork a longer shelf life.
How much does it cost to start resin art?
When you consider the cost of resin in the quantities required to make resin art, it can get rather pricey. The resin alone, on average, costs around $400. But, depending on the resin’s quality and brand, the cost of significant resin volumes can range from $250 to $600.
You should budget at least an additional $100+ for molds and other equipment, inks, paints, and other supplies you’ll need. Additionally, if you want to start a resin art business, you should budget roughly $100 to launch your website.
Do you need a heat gun for resin?
No, you don’t necessarily need a heat gun. However, depending on the type of resin art you will be doing it may be very useful and give you a higher-quality finish.
The type of heat source you’ll need will be determined by the materials you use and the effect you are trying to create.
A heat gun is the best tool to remove air bubbles. Heat guns are also advised for projects that use silicone molds, as the open flame of a flame torch could damage your mold. Finally, a hair dryer can be used in flow art, like ocean art, or where cells are desired.
If you are looking for a heat gun you can find more information here.
Can you use a hair dryer instead of a heat gun for resin?
No, a hair dryer can not replace a heat gun when it comes to removing bubbles from your resin piece. This is because they don’t heat the air to a high enough temperature like a heat gun.
However, hair dryers have their own use in resin art, which moves the resin around to create some unique abstract effects in fluid painting, like waves in ocean art.
The Bottom Line
When working successfully with epoxy resin, the old saying “use the right tools for the job” is true. Each resin tool is used for a specific purpose, so it’s essential to use the correct tools and to use them correctly to save you valuable time, effort, and money.
If you are a beginner, we hope this article has proven helpful and has given you the confidence to start experimenting and creating your resin masterpieces.
Feel free to share this article with a fellow resin art enthusiast!
