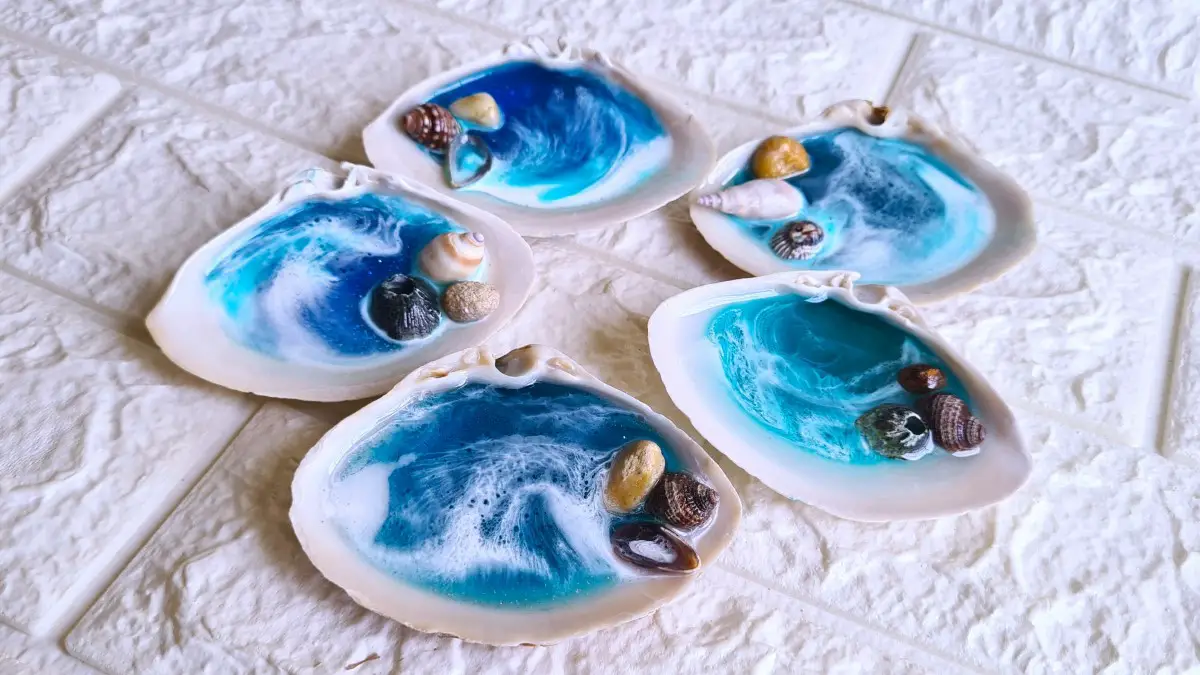
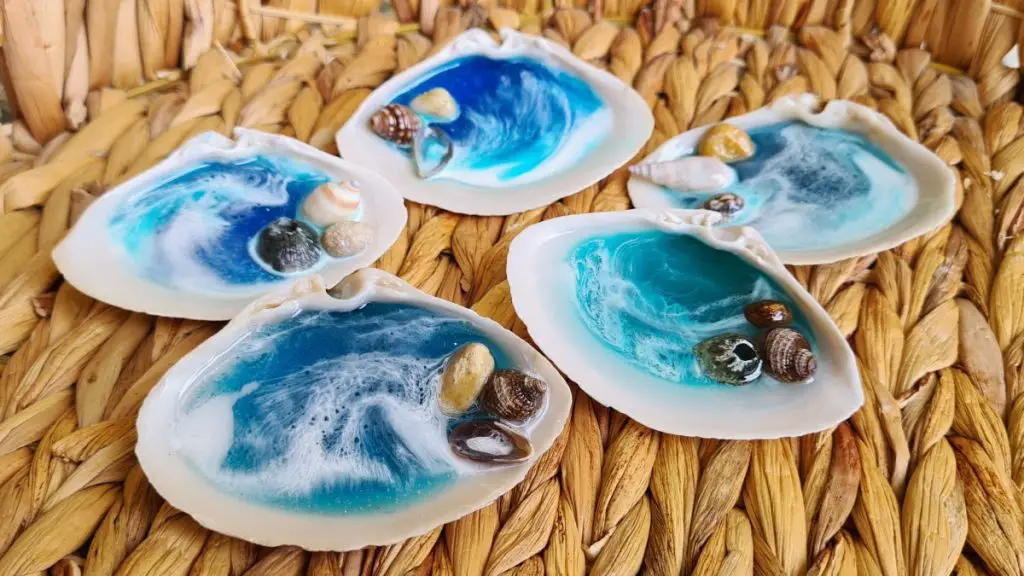
3 Easy Steps To Make Resin Sea Shells
If you’re looking to level up your resin skills and practice resin ocean lacing then this is the perfect project for you. And it’s easier than you think!
It only requires a small quantity of resin and allows you the opportunity to perfect lacing in resin waves without wasting too much material.
In this article, we’ll list everything you need to complete this project and we’ve also included simple and easy-to-follow videos and instructions.
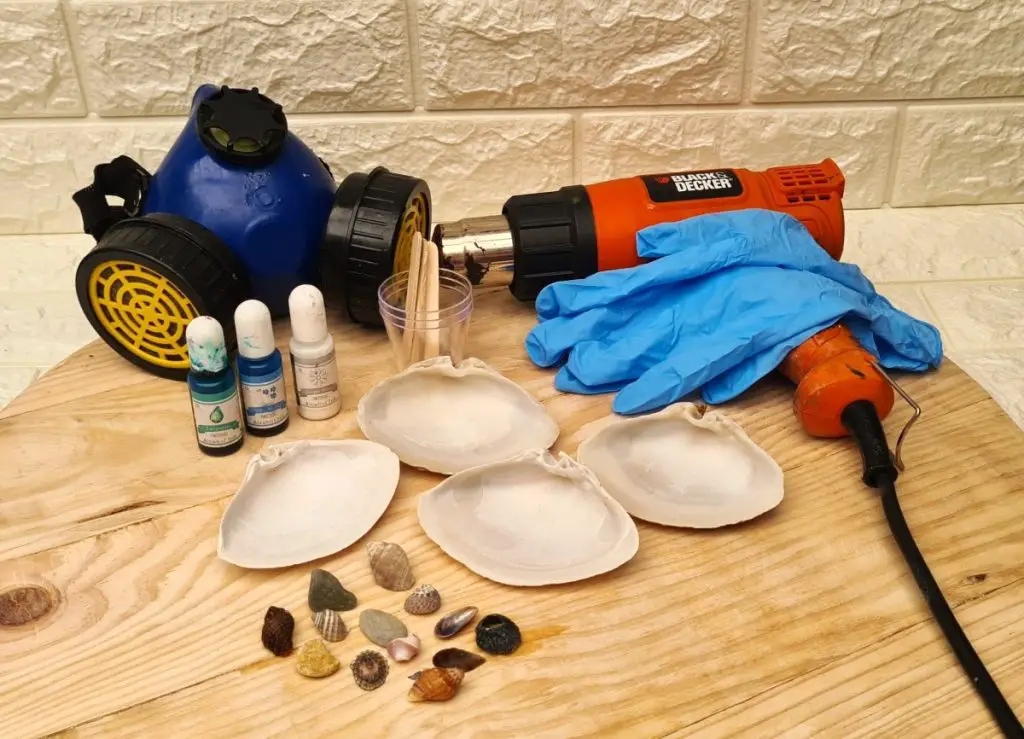
Step 1: What You’ll Need
Below is a list of all the materials and tools you’ll need for this project. For your convenience, we’ve included links to all of these products on Amazon (Paid Links) – happy shopping!
- Epoxy resin
- Mixing cups
- Mixing sticks
- A heat gun
- A digital scale
- Nitrile gloves
- A respirator
- Blue color pigments
- White color pigment:
- Shells – big and small
*Paid Links
Step 2: Preparation
As you might know, you only have a limited amount of working time with resin. This is usually around 20 to 40 minutes, depending on the brand of resin you use, and should be indicated on the label. After this time, your resin will start to cure, and you won’t be able to pour it and work with it easily.
Therefore, it’s best practice to be organized and prepare your workspace before mixing your resin to use your resin’s working time to its fullest instead of using that precious time to look for a mixing stick or a different color pigment.
Lay Out Your Tools and Materials
Have everything you’ll need for your project within reach – not on the shelf in the garage behind the freezer. This includes your resin, digital scale, heat gun, color pigments, PPE, etc. If you need a tweezer or a toothpick, get that too!
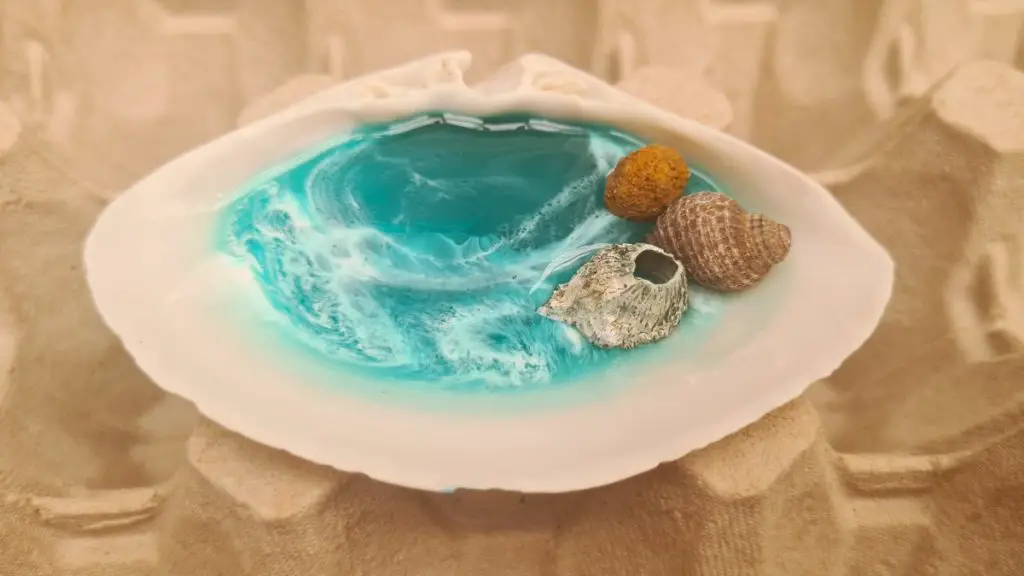
Prep Your Sea Shells
Make sure your shells are clean. We also found it’s best to elevate the bigger shells – the ones you will use to create your ocean in. Place them on a tub, cup, or egg box, and make sure it’s sturdy. The height will make it easier for you to use your heat gun later on and the sturdy base will help keep your resin level while it cures.
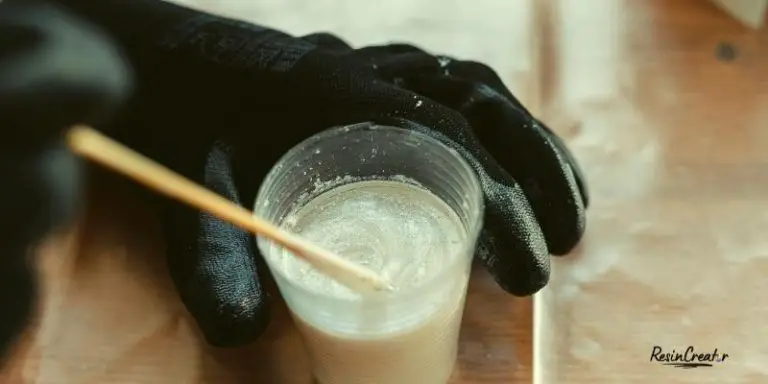
Put On Your PPE
This is the last step before mixing your resin and probably the most important one because it’s your protection. You might not always smell it, but resin does give off harmful fumes once combined with the hardener.
Also, while your creativity is in full swing, a drop of resin might come into contact with your hand as you mix or pour. So make sure your PPE is on – nitrile gloves and a respirator are of paramount importance.
Read our article for quick and easy steps to help remove resin from your skin.
Get the Temperature Right
Ensure your workspace is at the ideal temperature – around 75 Fahrenheit or 24 degrees Celsius.
Mix Your Resin
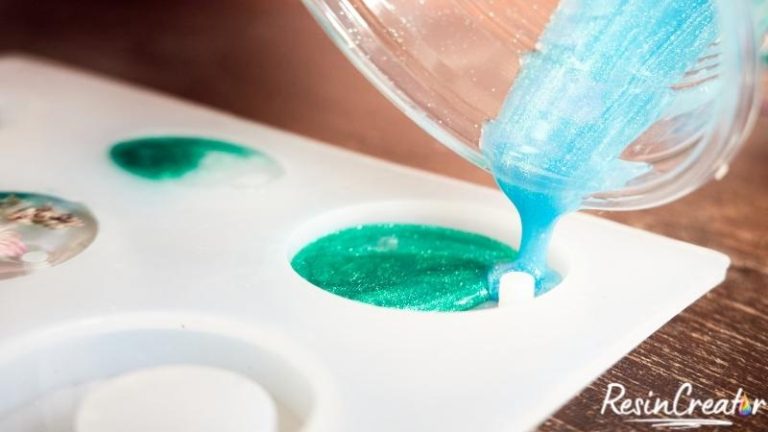
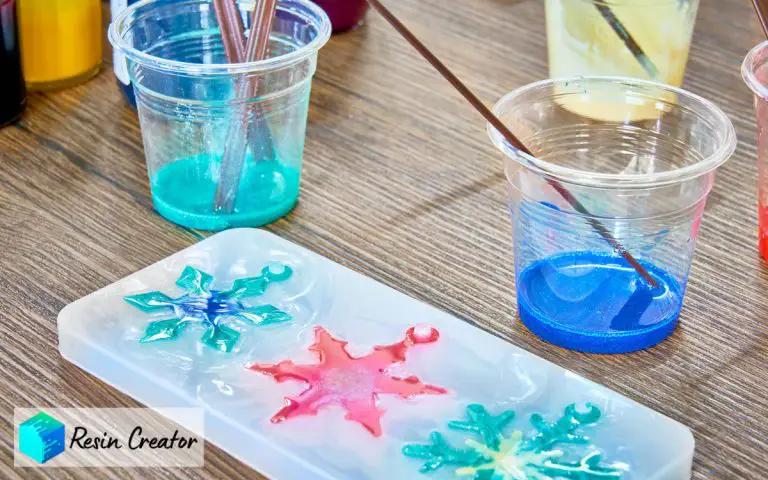
Weigh out and mix your resin according to its instructions. Once mixed, pour it into separate mixing cups and add your color pigment to each cup. We only used one shade of blue per resin ocean trinket because the shells were small but you can use more than one shade of blue if you prefer.
Tip: Resin pigments are quite potent. It’s best to add a little at a time until you reach your desired color. Remember to only add a maximum of 6% pigment to your resin – any more could result in your resin not curing properly.
Refer to step 5 in our article on casting resin for more information on how best to mix your resin.
Step 3: Pour Your Resin
There are two ways you can create your resin ocean trinket:
- Option 1: Mix and pour all the required resin – let’s call this the Single Layer method
- Option 2: Mix and pour your resin in two parts with a 4-6 hour interval or over two days – let’s call this the Double Layer method
We’ve done it both ways and you can decide which method you prefer. You might be strapped for time so option 1 would work in your favor. Or you might prefer the result of option 2 and go with that option.
Either way, you will end with a resin ocean trinket!
Let’s dive into each of these options in more detail.
Single Layer Method
- Mix enough resin for your entire project – your ocean as well as your waves.
- Separate your mixed resin into two cups, add your color pigments, and mix well for about 30 seconds.
- Let your resin sit for about 20-30 minutes to allow it to thicken a bit – this will prevent your waves from completely sinking/disappearing into the blue resin.
- After 20-30 minutes, pour your blue resin into your big shell and make sure it doesn’t fill your shell as you still need space to add your resin ocean waves.
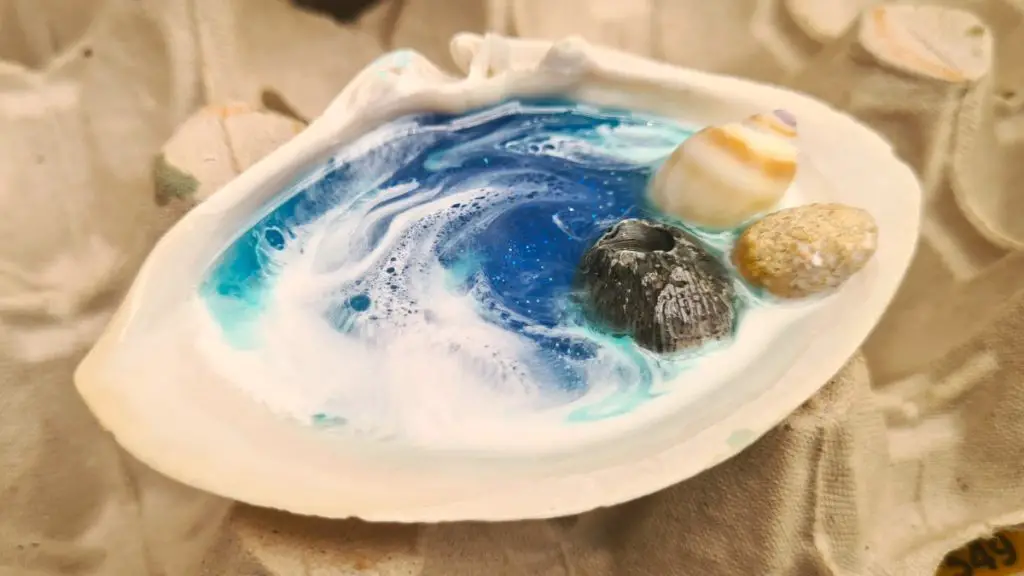
- Now pour a thin streak of white resin at the front edge of your ocean.
- Then take your heat gun and blow the white resin to create waves. Constantly move your heat gun. Don’t hold it in one spot for more than 2-3 seconds as your resin could burn.
- After 2-3 hours, add your small shells – this is optional and you can then also add a layer of clear resin.
- Let your project cure for 24 hours before moving it.
Tip: Your resin might take more or less time to thicken up than we’ve indicated. This depends on the brand of resin you’re using as well as the temperature of your workspace. We advise you to check your resin every few minutes by stirring it and checking its consistency. Your resin should be pourable but thicker than when you initially mixed it.
Double Layer Method
- Only mix enough resin for your ocean (not the waves).
- Add your blue color pigment and mix well for about 30 seconds.
- Pour your blue resin into your big shell and leave enough space to add your resin ocean waves.
- Allow this first layer to cure for a minimum of 3-5 hours. You can leave it overnight if you prefer.
- If you want to add small shells to your resin ocean trinket then do so after 2-3 hours when the resin is quite thick. This will prevent your shells from sinking to the bottom.
- After your first layer of resin has cured for a minimum of 3-5 hours (or overnight) you can then mix your next batch of resin.
- Mix enough resin to add a clear layer of resin onto your ocean (or you can choose to add some color pigment to it) as well as for your resin ocean waves.
- Divide your mixed resin into two cups – one with clear resin and one with white resin.
- Pour the clear resin over your ocean and make sure it completely covers the cured layer of resin – this will help your waves spread evenly across your ocean.
- Now pour a thin streak of white resin at the front edge of your ocean.
- Then take your heat gun and blow the white resin to create waves. Constantly move your heat gun and again, don’t keep the heat in one spot for more than 2-3 seconds as your resin could burn.
- Let your project cure for 24 hours before moving it.
Tip: Make sure that your ocean trinkets are level to prevent your resin from running to one side.
Watch our videos below for a visual tutorial of these two methods and let us know which one you prefer by leaving us a comment further down.
More Ideas for Your Resin Ocean Trinkets
There are a few things you can add to your little ocean trinkets to make them sparkle a bit more. Here are a few options for you to consider:
- Glitter: The ocean naturally twinkles in the sunlight. You can achieve this effect by adding some blue or silver glitter (Paid Link) to your resin. If you prefer green, pink, or purple oceans then go right ahead and add some matching glitters to your favorite color.
- Sand: You can add a little beach to your resin ocean trinket. Simply mix some beach sand (Paid Link) or fine sand into some resin and carefully place it in your big shell to create a little beachfront. You can add the sand before pouring your resin into the shell.
- Sea life: This is a fun optional extra and you can achieve this by adding tiny sea creatures (Paid Link) into your blue resin after you’ve poured it. Or you can add vinyl/sticker (Paid Link) cutouts of sea creatures once your blue resin has cured but before you add your waves.
Help! Stuck Between a Rock and a Hard Place
Let’s face it, sometimes things don’t go as planned…
Why Is There No Lacing in My Waves?
- Too much heat from your heat gun could very well “kill” your waves. It’s best to use your heat gun sparingly when creating resin ocean waves. If you want more waves, then let your first layer of waves cure for an hour or two before adding another layer.
Quick fix: If your resin is still pourable, then pour that layer off and start your wave over. Watch our video below on how to do this.
- Too little white pigment can result in a sort of white-wash effect. You can easily fix this by repeating the process – add another layer of blue resin and then add a bit more white pigment to your resin when creating your waves.
- Add a cell activator. This is the same product used to create cells in acrylic art. A few drops go a long way and you will immediately see the cells forming after you’ve poured your white resin onto your ocean.
Why Is My Rein Project Still Sticky?
This could be because your resin wasn’t mixed properly or it wasn’t measured correctly.
Read our article Why Is My Resin Still Sticky? which covers everything you need to know and how to avoid this from happening to you.
Why Are My Small Shells at the Bottom of My Ocean?
This would happen if your resin hadn’t thickened or cured long enough by the time you added your shells. Your resin needs to be thick to hold your decorative small shells above the ocean floor. This is usually around the 4-5 hours after you’ve poured your resin. However, different resin brands cure differently so it’s best to check the consistency of your resin before adding your small shells.
Tip: To check the consistency of your resin without ruining your design, check the leftover resin in your mixing cup. This is the same resin used to pour your design so it will cure at the same rate and give you a clear indication of the consistency of your resin at a point in time.
Final Thoughts
Resin can teach us, inspire us, and leave us in awe.
Teach us patience, to accept what we cannot control, and new skills.
Inspire us to create, push our limits, and share our skills.
Leaving us in awe of the masterpieces that we create – sometimes by accident!
Remember to enjoy the process of creating resin art and never be afraid to step out of your comfort zone.
“A comfort zone is a nice place but nothing grows there” – Gina Milicia.
If you enjoyed reading this article then please share it with your friends and fellow resin artists. We’d love to hear from you in the comments below!