How To Polish Resin Like a Pro
Anyone who has ever created a piece of art with epoxy resin will have noted that usually after the resin has dried and you’ve removed it from the mold, it lacks the ideal crystal-clear finish that most artists are after and has a foggy appearance instead.
Fortunately, epoxy resin polishing is a fairly easy process that could make the surface shine and give it a lovely gloss. This process is straightforward and guarantees an excellent outcome.
So, whether you’ve just finished sanding your art or are simply looking for a deeper shine, read through our tips and tricks. We demonstrate how to give your resin creation a beautiful finishing polish in just a few easy steps.
Note: Before polishing, review our resin sanding guide, so you’re prepared to tackle the polishing process.
Which Epoxy Resin Objects Are Suitable for Polishing?
It’s possible to polish nearly all types of epoxy resin pieces. Although the polishing procedure is usually straightforward, the size and shape of your piece will determine how easily you can polish it. You can apply epoxy polish to the following:
- Polishing cast objects
- Adding a shiny protective coat to your resin art
- Polishing large surfaces made of resin, like tables and countertops
- Objects made from epoxy and wood
- Adding a shimmering layer to epoxy resin floors
- Adding finishing touches
- Epoxy resin repairs
Getting Prepared To Polish
What should you do after you have poured your epoxy and allowed it to cure completely?
Your project may have flaws you want to fix after you’ve demolded the casting and examined it. Before you begin polishing, removing these imperfections is essential; otherwise, you won’t obtain the intended outcome!
To be on the safe side, listed below are the tools you’ll need to start work on the project’s final step that will make the process run a lot smoother:
- Sandpaper (120 to 1000 grit)
- Water
- Sanding block
- Scratch remover compound
- Buffing wheel
- Buffing supplies
- Wax products
*Paid Links
As you can see, quite a bit goes into giving your item a sheen that resembles glass. The secret to this is to be persistent and take it step-by-step; it will be worthwhile in the end!
Removing Imperfections
After coating or casting, and demolding your epoxy, you might discover that it has a flaw— scratches, hairs, bumps, and uneven coats are all common. Before starting the buffing process, fixing these flaws is essential if you haven’t already. We recommend sanding to remove these imperfections.
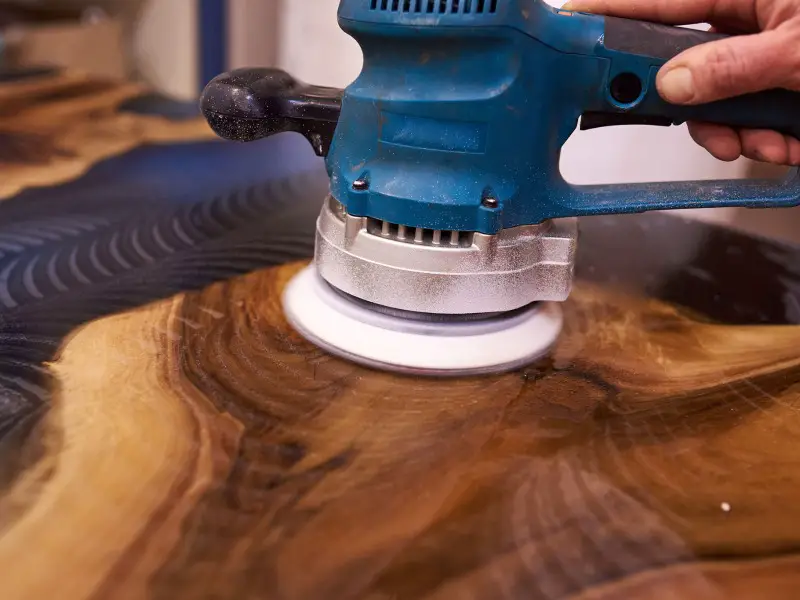
When polishing, you must have a smooth, spotless surface to work on. Working your way through several grits of sandpaper will help you achieve this. The lower the grit size, the deeper the scratches on the surface.
We recommend starting with a 120-grit piece of coarse, water-resistant sanding paper and gradually working up to 300-grit while sanding in a circular motion. You can do this either by hand or with an orbital sander.
When the resin’s surface is flat and smooth, the sanding process is complete, and you can start polishing. To increase the efficiency of the sanding paper, you must wet sand your resin. Wet sanding facilitates the removal of extra-cut materials that can obstruct the flow of resin and sanding paper.
Additionally, the water keeps dirt from collecting on the surface. If you haven’t already, we want to remind you to review our sanding advice before polishing to prepare you for the task ahead!
How To Wet Sand Resin
You can start by wetting the sanding paper with a spray bottle or a bowl of water, or you can wet the surface of the epoxy resin directly.
Start using circular motions to sand the resin using your sanding paper.
You will soon see that the water on the resin is starting to turn milky. Before you begin sanding again, remove this water with a clean rag and reapply some water to the surface.
The finer grain of your sandpaper will have less effect on the resin surface as you increase the grit of your sandpaper. Any remaining scratches after this technique will be tough to remove.
When sanding the edges of your resin object, take caution and go slowly. The final step is to remove any extra water from the surface.
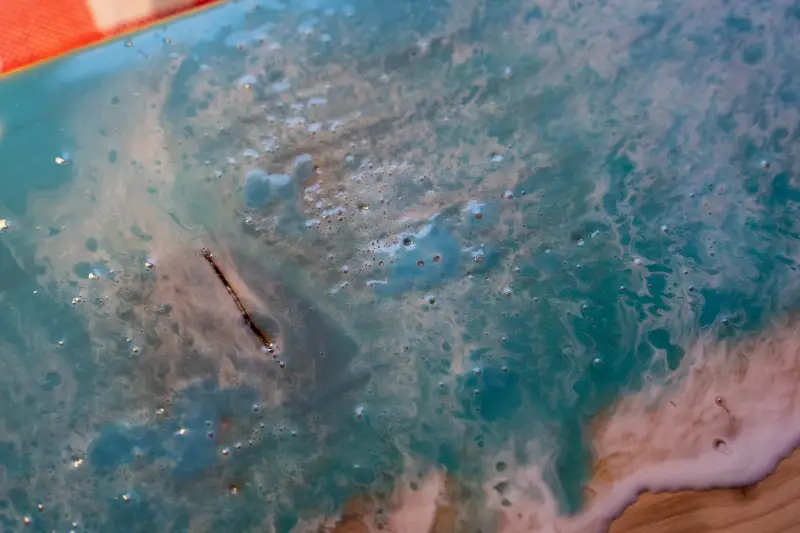
Why Is My Epoxy Cloudy After Sanding?
You might find your surface flat and smooth yet foggy after you sand. This is normal.
Sanding leaves behind tiny scratches that reflect and diffuse light, eliminating any shine that may have previously been there. So even while your surface feels smooth to the touch, it won’t appear smooth to the eye.
Epoxy is soft, which unfortunately makes it vulnerable to damage from sanding, knives, sharp objects, etc. Fortunately for you, repairs are quick and straightforward.
You have two options for refinishing your surface: buff and polish or a clear epoxy coat! For this post, we will only discuss buffing and polishing; however, if you’re interested in learning more about the alternative, you can read about the best practices for applying a second coat of epoxy.
Wet Sanding vs. Buffing
Sanding your surface down is a necessary step in the polishing preparation process. To do this, either wet sanding or buffing are possible options.
Skipping this stage won’t give you the glass-like polish your project deserves. You can choose to do one, the other, or both.
With wet sanding, you gently sand from coarse to grit, moving in circular motions from 120 to 1000, either by hand or with an orbital sander. You might discover that your epoxy is sufficiently polished when you reach the highest grit.
In contrast to sanding, buffing serves more as a filler than a remover. You effectively fill in the scratches on the surface of your project when buffing. Using a polisher with a variable speed, slowly work the compound into the surface.
Manual vs. Machine
Are you wondering whether to use a Dremel or the traditional method of hand buffing?
Well, it depends! It might be simpler to use a stationary disc sander and buffing wheel when working on smaller, more intricate tasks, such as rings or jewelry, than to sand and buff by hand. On the other hand, this machine gives you more control and higher precision when addressing minor details.
Using a Dremel is similar to this technique because it allows you to manage where and what you’re polishing and is perfect for working on small objects.
Hand polishing is another option if you want to concentrate on specific areas. For example, if you used a buffing machine for a large project but want the edges to shine, you can grab a polishing compound and polish it to your liking!
A buffing machine is perfect for large projects. As we previously mentioned, a Dremel works great for intricate jobs and smaller projects that you can complete by hand afterward. Using a Dremel on an entire table would take a long time, and you might still need to touch up the surface later.
Polishing Smaller Areas With a Drill
You should attach the proper polishing attachment to the drill’s end to polish smaller regions.
By turning on the drill and pressing the attachment disc against an edged object, you can prepare the fibers of the attachment for use.
Turn the drill off before applying the polishing resin paste to the attachment. Then, restart the drill and hold the polishing piece carefully against the resin.
When applying the polish to your epoxy resin creation, ensure your actions are smooth and controlled. Work gently and meticulously until the artwork has an even sheen throughout.
It is easy to apply too much pressure and harm the resin’s surface, so try to use the least amount of polish possible at a time.
If necessary, use an extra-fine polishing attachment to go over the polished surface, or you can rework the surface manually.
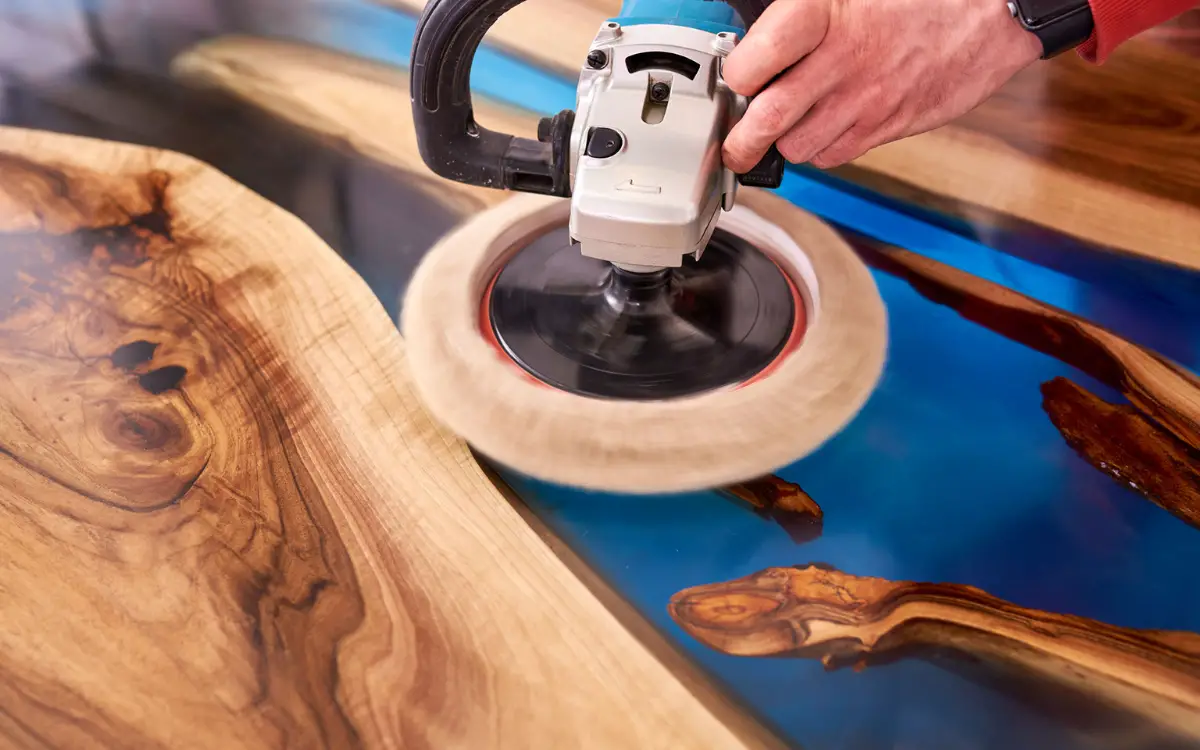
Polishing Larger Areas With a Polishing Machine
We recommend using a polishing machine for larger surfaces because you can cover more ground while managing the rotational speed.
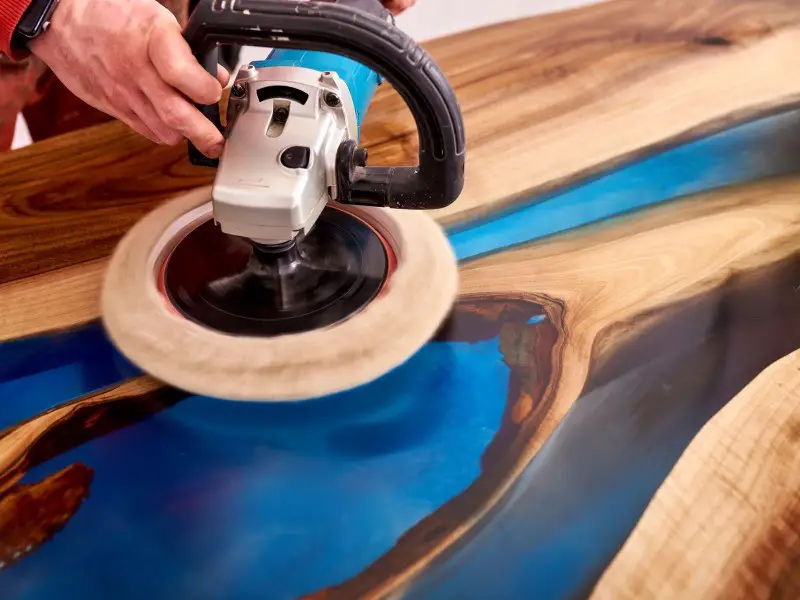
Polishing machines can move in circular or more random motions, which allows for more effective polishing, as opposed to drill bits, which must rigidly rotate around a fixed axis.
To polish your piece with a polishing machine, follow the tool’s instructions for the best results. Keep the tool level to the surface to prevent uneven polishing and excess resin loss.
How To Polish Epoxy Resin Manually
Instead of using a drill, you can also hand-polish smaller epoxy resin pieces. You can regulate every aspect of the process using this technique.
For this method, you’ll need a bucket of clean water, a piece of linen or cotton cloth, a hard, rectangular object (e.g., a block of wood), and a transparent polishing paste. Simply follow these guidelines to learn how to polish epoxy resin by hand:
On a piece of cloth, apply a small amount of polishing paste. Next, lightly dampen the cloth with water.
Rub the cloth gently over the resin’s surface in steady, circular motions. This process can take some time before any noticeable progress will be visible.
To polish your piece’s straight surfaces and edges, use the wood block (or any object with a similar angular shape). Then, simply wrap the cloth around the wood’s perimeter and rub it over the surface’s corners and edges to get a shine.
Resin Polishing Compound
You can finish your epoxy project to your satisfaction once you’ve done buffing.
However, a polishing compound is best if you want an even, uniform, flawless sheen. Generally speaking, most polishing agents for wood will also be effective for resin.
Liquid Smooth polishing compound from Stone Coat Countertops will significantly increase your shine. It is explicitly designed for epoxy resin and is among the best polishing compounds. Simply apply Liquid Smooth or any other polishing compound over the epoxy and the buffing pad, then buff away!
When using a polishing compound, working in small sections will guarantee a consistent sheen throughout your project. Buffering will bring out the shine, so stop settling for boring epoxy projects!
3M Perfect-it Medium Cutting Compound and Wax
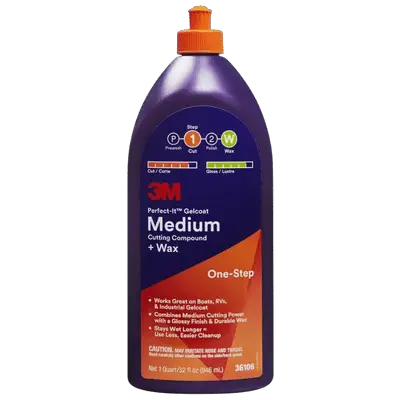
This is a basic polish meant for boats but this is exactly why it is perfect for finishing resin. The resin used for art is very similar to that used in boat construction so many of the products used on boats will work well on resin art.
The added benefit of this one is that it includes wax in the polish so it will give the art piece a lovely silky finish that will make it easier to clean and feel great to the touch.
You can go back and polish the work again and again if you want to, this will allow you to repair any scratches or defects on the surface and keep the great finish on your art.
*Paid Links
Important Considerations When Using Resin Polish
When polishing your resin item, keep the following things in mind:
If the polish does not adhere to your piece’s surface immediately, try not to get discouraged. A surface’s matte appearance is frequently caused by too much polishing paste. You can fix this by routinely wiping away paste buildup with a clean, soft cloth.
Only use a transparent polishing paste. Your polishing product may leave behind a colored hue or even thicker deposits of color that are challenging to remove if it is not entirely transparent.
Final Thoughts
There are a lot of things that could go wrong with your epoxy resin art. Luckily you can remove some of the flaws by sanding the piece and then buffing it to a pristine shine!
If you found this article helpful, remember to check out our other blog posts for more resin tips.