Sanding Resin
Sanding is a crucial step in epoxy resin crafts, whether you’re producing a resin table with epoxy and wood or exquisitely hand-crafted resin items. You can give your epoxy resin a polished, smooth surface that completes your sculpture by sanding it.
Sanding resin can be challenging, especially if it’s your first time working with epoxy. In this instructional piece, we go over the most effective techniques for sanding resin and demonstrate how to sand epoxy resin to get the best results.
How Easy Is It to Sand Epoxy Resin?
You need to be aware of a few things while sanding epoxy resin. Epoxy resin can be challenging and sometimes dangerous to sand, but with the appropriate techniques, you can sand resin safely.
The hardness of the surface is the biggest challenge while sanding resin and the toxicity of the particles is the primary safety concern.
But don’t let these difficulties hold you back! Below we’ve mentioned different ways to sand your epoxy resin while avoiding these issues.
The Hardness of Epoxy Resin
A hardener and a liquid resin make up epoxy resin. The two components’ chemicals react together to produce a rigid and very solid surface.
Because of how tough this resin surface is, abrasive sandpaper can quickly get dull and clogged.
To keep the sanding process efficient, you must frequently replace your sandpaper.
Wet sanding is preferable for sanding resin as it helps keep the paper from getting clogged and minimizes dust creation.
Sanding Safety
If you inhale resin sanding dust, it can have a severe negative impact on one’s health. Using a mask when sanding epoxy is always advised since the tiny resin particles are toxic and can harm your lungs.
As you sand resin, wet sanding can also aid in lowering the dust generated and sent into the air.

Epoxy Resin Sanding Methods
There are several different techniques you can use to sand epoxy resin. Here, we’ve given you a quick rundown of these techniques to see which is the most effective and which you should avoid:
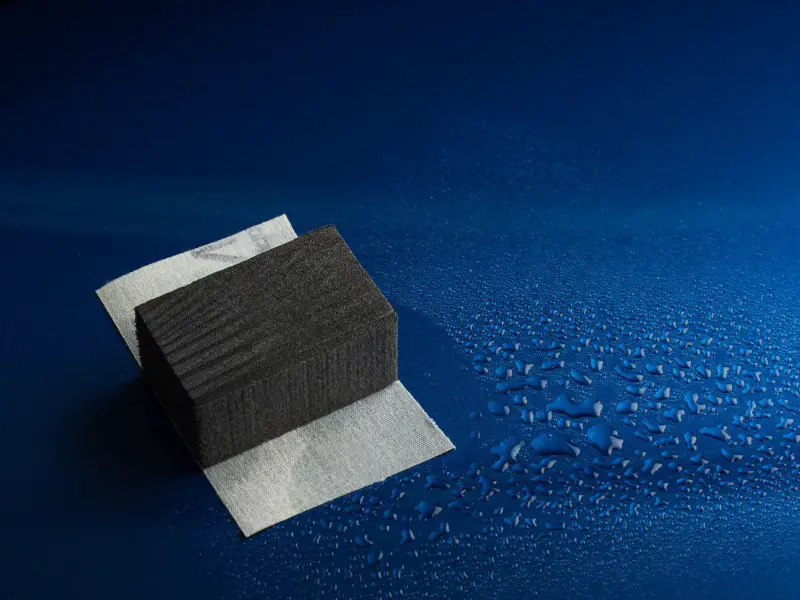
1. Waterproof Sandpaper
Epoxy resin is wet sanded using waterproof sandpaper. The grit levels of waterproof sandpaper range from 60 to 4000. The ideal technique for sanding resin is to use waterproof sandpaper for two reasons:
- Because it doesn’t clog up while sanding, the sandpaper lasts longer. This is because the water quickly cleans the material’s surface of resin particles.
- Because there is far less resin dust produced, working is much safer.
- Sanding Pad / Block
Sanding pads, sometimes referred to as pad sanders, are potent hand instruments used to sand resin. A pad is built into these sanding pads that connect to the motor. The pad comprises materials like firm rubber and comes in various forms.
The sandpaper fastens to the pad either by exerting pressure or clamps. You can even accomplish sanding with these sanders. An added benefit is that these sanding pads absorb the resin dust during the sanding process.
2. Electric Sanding Machine/Air-powered Sander
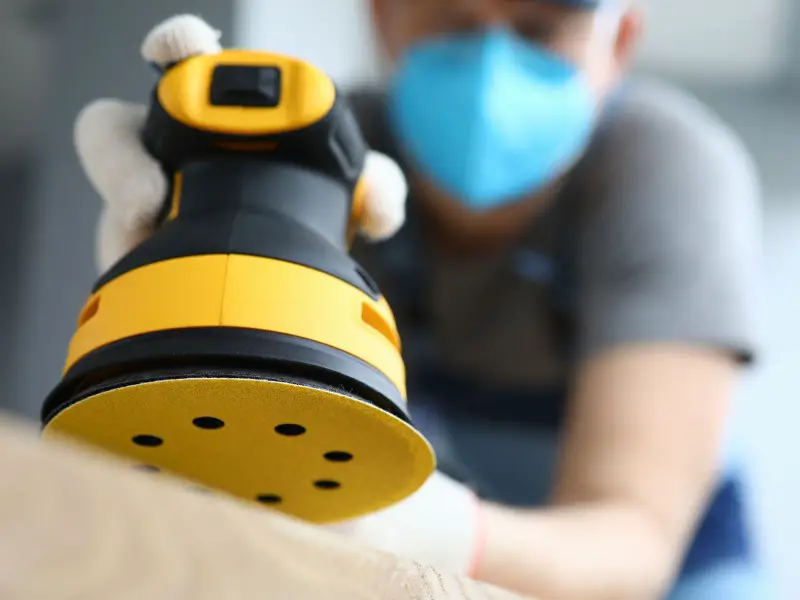
Air-powered sanders use compressed air to drive revolving sanding discs. There is a button that controls air pressure on the sander.
On the other hand, electricity powers the sanding operations of electric sanding equipment.
When you want to dry sand your resin, we advise using these tools. They can significantly reduce the time and labor necessary to sand your resin, making them ideal for large pieces.
3. Dremel Tool
The Dremel tool uses rotatory motion to level resin surfaces. You can also use a Dremel to sand epoxy resin sanding. However, using Dremel sanding tools requires the same degree of caution as using any other electric sanding tool.
Make sure the Dremel has the polishing head attached to it when sanding.
Applying too much pressure risks deforming the resin, so be careful.
Work slowly and take frequent breaks to prevent overheating the resin, which could cause it to melt.
Dry Sanding vs. Wet Sanding
Wet sanding resin is preferable over dry sanding for the following reasons.
Dry sanding generates a lot of resin dust, which makes the workplace unsanitary. In contrast, the dust created during wet sanding blends with water and does not become airborne. But it can get a little messy doing this.
Sandpaper is far more effective and lasts longer during wet sanding than with sanding. However, sandpaper used for dry sanding quickly becomes clogged due to resin particles, necessitating replacement or frequent cleaning.
The resin may melt due to the heat created by dry sanding. Applying water during wet sanding lowers the temperature, preventing the resin from melting.
When Should You Dry Sand Epoxy Resin Instead of Wet Sand?
There may be instances where dry sanding produces superior results. However, wet sanding epoxy resin on wood, especially light wood, is not advised since wood typically absorbs moisture fast and can change its condition.
When working with mixed epoxy resin or sanding epoxy resin on wood, dry sanding would be your best option. However, it is also acceptable for other materials that are susceptible to humidity. Dry sanding also works well for large projects.
If you’re going to dry-sand epoxy, you’ll want to ensure good respiratory protection.
Sanding Tips and Tricks
Epoxy resin sanding can be challenging. However, with a few tips and tricks, you can succeed:
- Put on a dust mask before anything else. Resin dust created by sanding can be quite dangerous to breathe in.
- Before sanding, make sure the resin is dry.
- It can be very messy to wet sand. Therefore, if you choose that, carefully cover your workspace with a newspaper or tarp.
- While wet sanding, frequently wipe your workpiece dry with a paper towel.
- Dry sanding can produce heat. Therefore, be sure to take rests in between to prevent the resin from melting due to high temperatures.
- Go from the lowest grit grade of sandpaper to the largest grit grade (from 80 to 800).
- When hand sanding resin, use even pressure and change the direction of motion.
How to Wet Sand Epoxy Resin
Step 1: Set Up the Wet Sanding Epoxy Equipment and Supplies
To wet sand, you’ll need waterproof grain sandpaper. For better results, you should start with higher grain, say 120-grit. This is due to surface scratches caused by less than 120-grit waterproof sandpaper.
Sanding pads are also suitable for wet sand. It requires a bowl, a pair of gloves, respiratory protection, wooden wraps or pieces to cover paper, water, and clean cloths.
What Is Waterproof Sandpaper?
Epoxy resin wet sanding typically calls for waterproof sandpaper. It has a silicon carbide closed layer. The paper comes in grit sizes ranging from 60 to 1000. However, one should start with a grain of 120 or more for epoxy resin because too little grain can result in extensive surface scratching.
You can repair scratch-related damage with a great deal of perseverance and a lot of effort. For example, if you want a nice sheen on the resin surface, you can wet-sand your artwork to 3000 grains. You can also clean the surface with a polishing compound and machine.
Step 2: Surface Cleaning
Put your safety gear on. Your safety gear should contain a pair of gloves, a breathing machine, some goggles, if necessary, and anything else that will shield you from harm and injury from sanding.
Before you sand, you must ensure the surface is clean of all debris. When hand sanding, leaving waste on the surface can also result in wounds and injuries. Use a clean rag or a soft brush to clean the floor.
Step 3: Prepare Water for Sanding
You must apply water to the surface both before and after sanding. You can either keep a bowl or pail of water nearby, or you can use a spray bottle filled with water.
Select only the approach that is best for you. For example, it’s important not to expose epoxy to hot water since the heat will cause the epoxy to melt and make a huge mess. Instead, use cold water while using the wet sand technique on epoxy resin.
Step 4: If Necessary, Wrap the Sandpaper Around a Block
Wet sanding resin is often done by hand; however, it can be challenging for most individuals. To wrap the sandpaper in a way that makes sanding easier, keep in mind the size of the surface that you want to sand. For example, you can use a sanding pad if the surface you need to sand has a lot of curves.
Step 5: Sand the Epoxy Resin
After the surface and the sandpaper have dried, you should begin sanding the epoxy resin. Because the epoxy resin is typically smooth, aggressive or coarse sandpaper shouldn’t be necessary.
If you observe that the epoxy resin has various irregularities, you can begin using the 60-grit or 80-grit sandpaper. However, you must use extra caution when using coarse sandpaper because uneven strokes or motion damage epoxy.
Step 6: Wet the Surface of the Epoxy Resin
Use your spray bottle to mist water on the surface you want to sand. If you don’t have a spray bottle, dip it into a pail of water and sand or pour some water on the top.
After applying water, sand the epoxy resin’s surface with the abrasive side of the paper in a circular motion.
Step 7: Surface Cleaning
After sanding, you can wipe the surface with a moist rag before drying it. Removing any remaining sand or debris from the surface is frequently advised because doing so becomes more difficult as the epoxy dries.
How to Dry Sand Epoxy Resin
Step 1: Set Up the Equipment and Supplies Needed for Dry Sanding Resin
Gather all the necessary tools before starting epoxy resin sanding. You’ll need sandpaper, an electric or battery-powered sander, respiratory gear, a few pairs of gloves, some glasses, and a rag for dried epoxy sand.
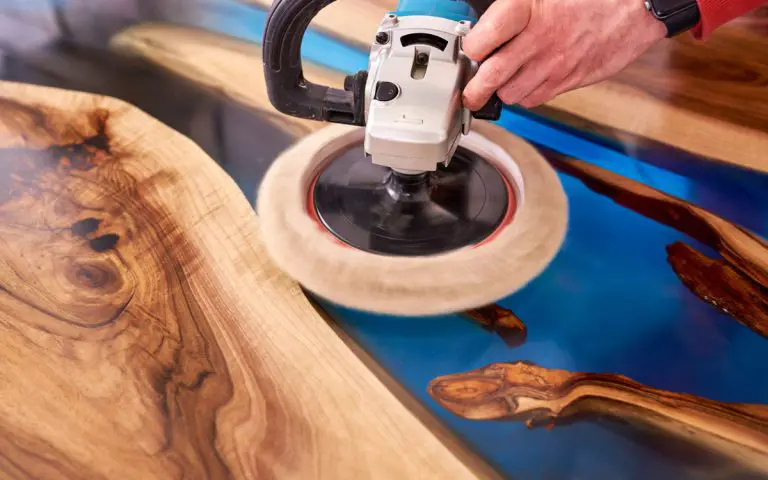
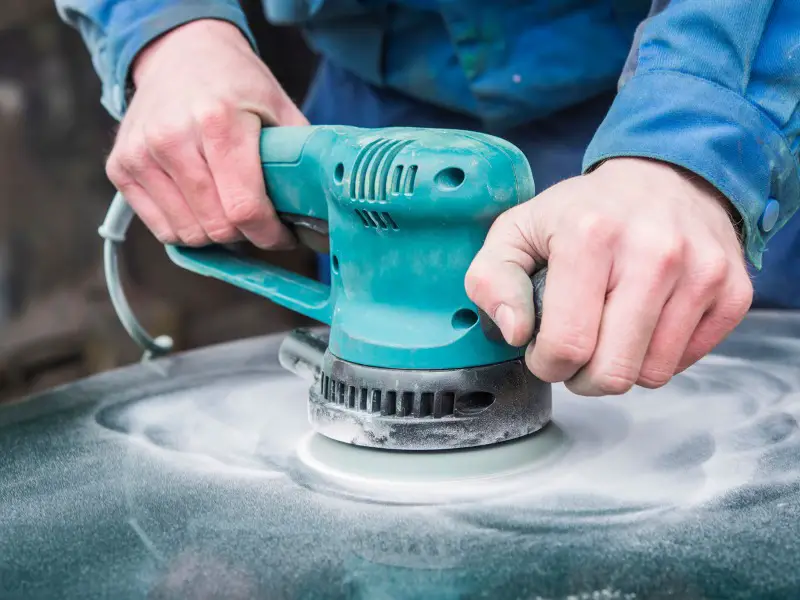
The most effective method for removing epoxy resin is a random orbital sander. Thanks to its fast speed and dustless features, this tool can operate on any surface with little to no mess. In addition, you can achieve excellent outcomes every time by changing your orbit as necessary during your cycle.
Step 2: Get the Surface Ready
Before you start sanding, you should follow the same preparation procedures for wet sanding. It is essential to clean the sanding surface and to set up your safety equipment. To ensure your safety, keep in mind that dry sanding produces a lot of pollutants. So wear a mask.
Step 3: Create a Properly Ventilated Area
Before dry-sanding the epoxy resin, you should prepare a well-ventilated work environment. Then, transfer the epoxy resin surface outside if at all possible.
If moving the epoxy resin surface outside is not an option, ensure all windows and doors are completely open before sanding.
Step 4: Use the Appropriate Sandpaper
Since you use a sander, you must use the proper sandpaper on the bottom of the sander. For a particularly rough resin, you can begin by sanding the surface with coarse sandpaper, such as 80-grit sandpaper. Otherwise, start sanding surfaces made of epoxy resin with 120-grit or 150-grit sandpaper.
Usually, the sander and the sandpaper come with instructions for attaching the sandpaper. The majority of sanders use a sandpaper clamp. Pulling a lever, often positioned behind and next to the sander, will release the pin.
Step 5: Sand the Epoxy Resin
Once you’ve added the appropriate sandpaper, you can turn the sander on. Pull the lever while placing the sander’s bottom on the work surface.
To keep track of your progress, start gently. When used, sanders vibrate a lot, so hold them tightly to prevent damage to your work. Avoid overloading the sander or over-sanding the surface!
You should carry a backup because dry sanding resin can quickly wear down the sandpaper. Replace the sandpaper if you discover the old one is no longer suitable. Finish by using 320 or 240-grit sandpaper on the sanded area.
Step 6: Surface Cleaning
You can use a clean rag or soft brush to wipe off the sanded surface and remove any epoxy glue residue because dry sanding can spread dust.
What Is Amine Blush?
You might discover that your epoxy resin piece has developed a wax-like, sticky covering once it has dried and set. This condition, called “amine blush,” occurs due to significant temperature variations during the curing process. As a result, this layer’s appearance is prone to fluctuate, sometimes making it challenging to see.
Extreme temperatures will likely reveal an amine blush layer as a hazy, oily layer on the resin’s surface. This waxy layer usually has no effect on the resin surface under the amine redness, but removing the amine blush before sanding will make the job much easier.
How To Remove Amine Blush
Although an amine blush layer is unlikely to affect the cured resin’s surface, we recommend removing it to prevent your sandpaper from wearing out too quickly. In addition, this layer must not be present if you intend to paint or laminate resin coat your object because the paint will adhere to this layer rather than the resin surface, resulting in peeling later.
The following will help you remove amine blush from your resin surface:
To start, use a sponge, warm water, and soapy water to attempt to remove the coating. If that doesn’t work, try using a cloth and spirit to get rid of it. Wet sanding the surface is another method for getting rid of amine blush.
Final Thoughts
As we’ve mentioned, sanding is essential to every resin project. Whether you are trying to smooth things out, remove some imperfections, or go after that sought-after shine that we associate with epoxy resin. After sanding resin, you should polish your piece for a crystal-like shine.
We hope this article will help and give you the knowledge to sand your epoxy art confidently. Don’t forget to share it with a fellow resin art enthusiast!