A Beginner’s/Newbies Guide to Making Resin Keychains
As a new resin artist, we know you’re bursting with ideas for your next project. You probably have a few resin keychain ideas as well!
Making resin keychains are both satisfying and easy. And we need to highlight that it’s an excellent project for a new resin artist for three reasons:
- It’s a small project and uses very little resin.
- You can play around with colors, inserts, and shapes.
- It’s a great option for practicing and mastering your skills before moving on to bigger projects.
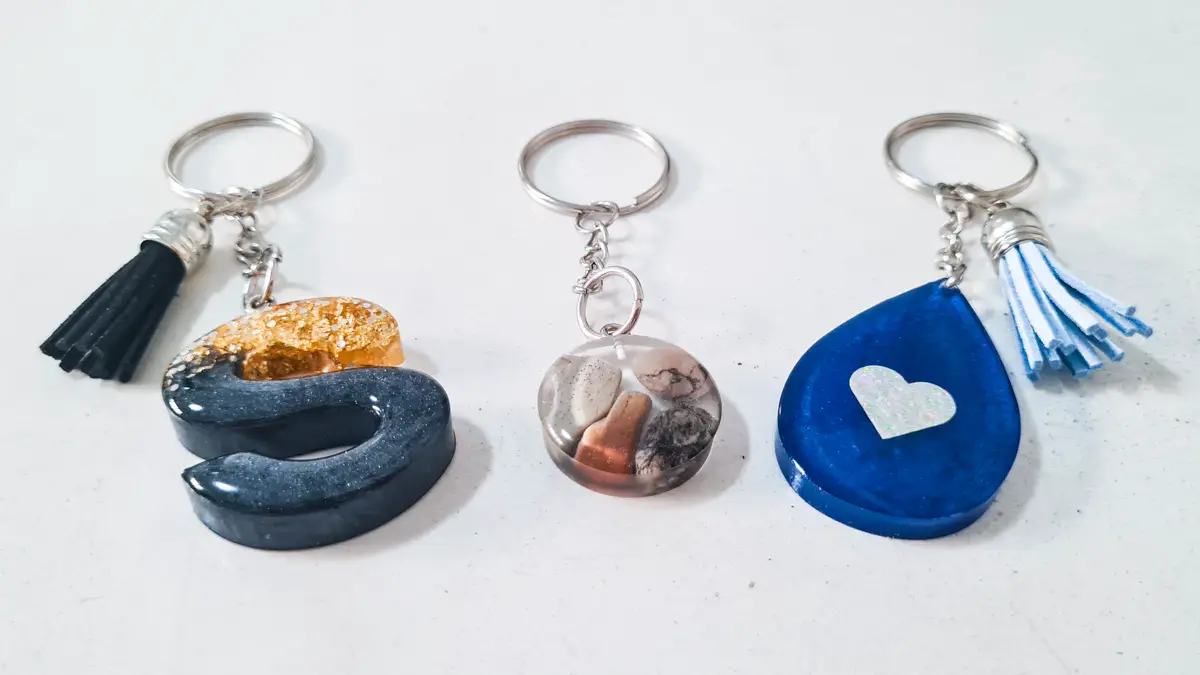
Our guide will walk you through the entire process of how to make keychains with resin, and we’ll cover three different resin keychains ideas.
After reading this article, you’ll better understand what you’ll need to make resin keychains, what to do and how to do it.
What Supplies Do I Need To Make DIY Resin Keychains?
First things first, we need to get our materials and tools. Here’s what you’ll need:
- Epoxy resin (resin and hardener) – (Find it on Amazon *Paid Link)
- A silicone mold
- Mixing cups
- Mixing sticks
- A digital scale
- Nitrile gloves
- A respirator
- Color pigments or inks
- Inserts such as flowers, gold leaf foil, glitter, etc
*Paid Links
See our complete list of recommended resin art supplies here.
Tip: To get started quickly and easily you can buy a resin keychain kit, which includes everything you’ll need. This one is a good option (Paid Link).
As mentioned before, we’re making three different keychain designs. We’ll list any additional supplies you’ll need as we get into each of them.
What Do I Need to Prepare Before Casting Resin Keychains
This step is vital due to the limited time you have to work with resin before it starts to cure. The working time of epoxy resin is usually 20 to 40 minutes. This will be indicated on the label, so be sure to read it.
- Check that your workspace is at the ideal temperature: This is around 75 Fahrenheit or 24 degrees Celsius. This is important as it will affect your resin when you mix it and when it’s curing. If your workspace is not at the ideal temperature, your resin and hardener might not mix through well enough, unwanted air bubbles are more likely to occur during colder temperatures, and your resin might not cure correctly or at all.
- Get all your required materials and tools and pack them out on your workbench: Organize them in an orderly fashion and ensure that they are all within reach. This helps save a lot of time when you start to cast your resin and get into the creative part of the resin art-making process.
- Prepare your resin keychain mold: Ensure that your molds are clean and level. You can clean your molds by dabbing them with painter’s tape or sellotape. This quickly removes dust and any small resin bits from a previous project. Next, spray your mold with Ease Release 200 (Paid Link) to prolong the life of your mold.
- Wear your PPE: Please don’t ever skip this step. Resin is harmful if it touches your skin and when you inhale the fumes. Be sure to wear your gloves and respirator. Read our resin safety article for more detail on your safety when working with resin.
- Check the resin’s working time: This information will be on the label or data sheet. The average working time of epoxy resin is 20 to 40 minutes. Be sure to cast your resin keychains within this time frame to avoid flash curing (this is when the resin cures in a flash and is rock hard within minutes). Keep a clock or timer close by to help you keep track of the time.
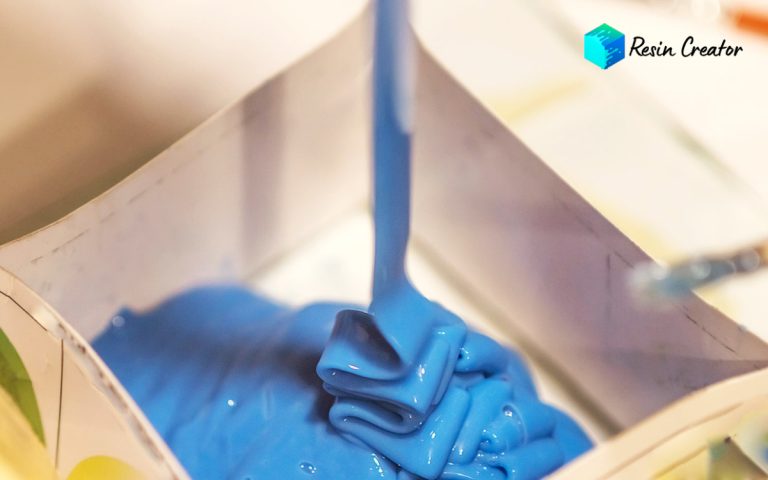
- Mix your resin: Measure your resin and hardener according to its instructions. Then mix slowly and thoroughly, scraping the sides and bottom of the container. This is key to avoiding bubbles and ensuring that your resin cures properly. Refer to step 5 in our resin casting article for more detail on how best to mix your resin.
So now that all your prep work, measuring, and mixing is complete, we can move on to the exciting part – casting resin!
Design 1: Resin Letter Keychain
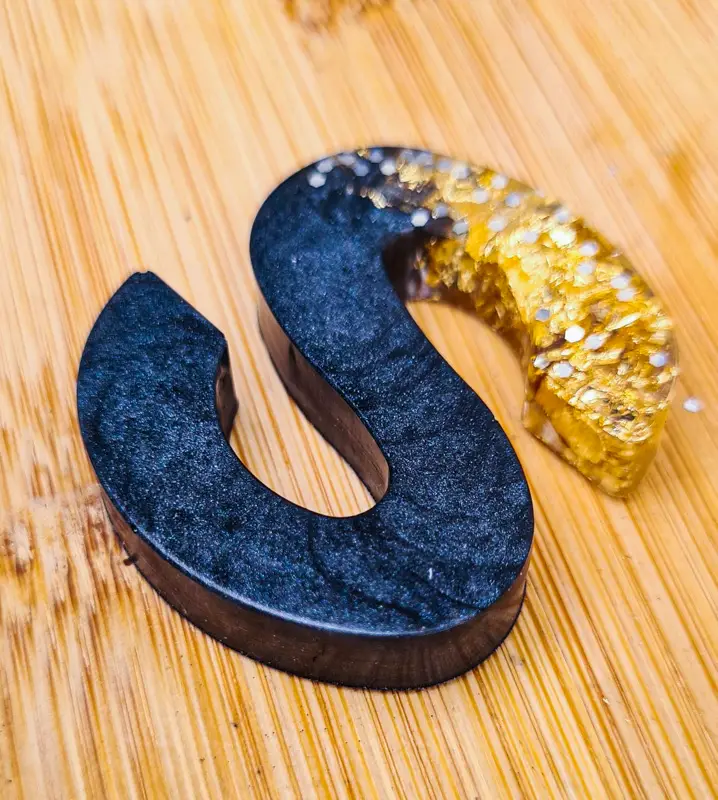
This is a trendy keychain, so we used it as our first design.
These keychains also make cute personalized gifts. So once you’re done, you can wrap it up and surprise your family or friends with your beautiful creation!
We’re sure you’ve wondered how to make resin letter keychains. Well, you’re in the right place!
Step 1: What You’ll Need
You won’t require anything other than what we listed above.
If you need an alphabet mold, here’s a great option. (Find one on Amazon or Aliexpress *Paid Links)
Our resin letter keychain will have a portion of glitter, gold leaf foil, and black pearlescent pigment. So this process will involve two easy pours.
Don’t worry! Our primary focus is you – the new resin artist – so we will take this nice and easy and guide you through this two-pour process.
We’ll also share some tips to help you along.
Step 2: Cast Your Resin Letter Keychains
Now that all your prep work has been completed, you can cast your resin keychains.
Here are some essential steps to follow when casting resin letter keychains:
- Divide your resin into two mixing cups: You need one cup for your glitter and gold leaf foil and another for your color pigment. Feel free to use any color you like! Add your glitter and color pigment to the separate cups and give them a good, slow stir.
- Let your resin thicken: After you’ve mixed your resin, let it stand for about five minutes so it can thicken up slightly. This will help when doing two pours, especially when using a small mold such as a letter. The resin won’t quickly flow into the entire mold giving you more control over the design.
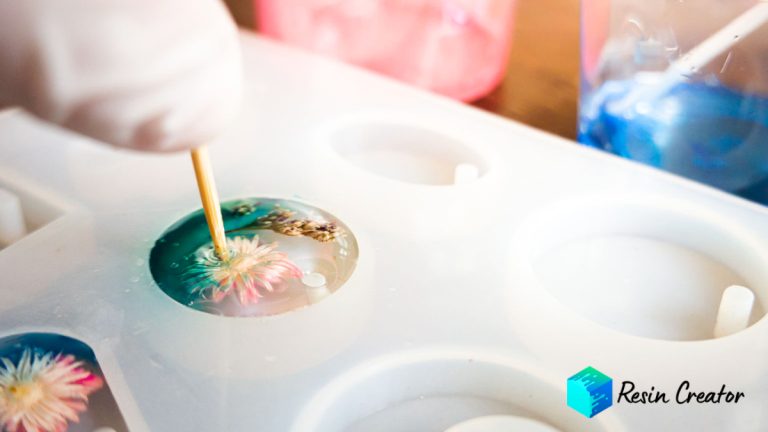
- First pour: Keep your hand steady and pour slowly. We suggest pouring your glitter and gold leaf foil resin first. Then, you can use a popsicle stick to help guide the resin into the mold. If the glitter resin covers more of the mold than you would’ve liked, then you can use your popsicle stick to push it to the side you prefer. Or you could leave it and see how it turns out – you might even like it!
- Second pour: Now, slowly pour your color resin and fill the rest of the mold.
Tip: If you have any resin left over, you can fill the other empty letters in your alphabet mold. As a beginner resin artist, you might have mixed too much resin. A spare mold can help avoid panic when you scramble to find another mold.
Step 3: Let Your Resin Letter Keychain Cure
And now we wait and allow the resin to do its magic.
Resin usually cures within 24 to 72 hours. Check the datasheet or label to be sure. If it’s hard to the touch, then it’s cured.
Once your resin letter keychain is cured, you can de-mold it. It should pop out of the mold quite easily.
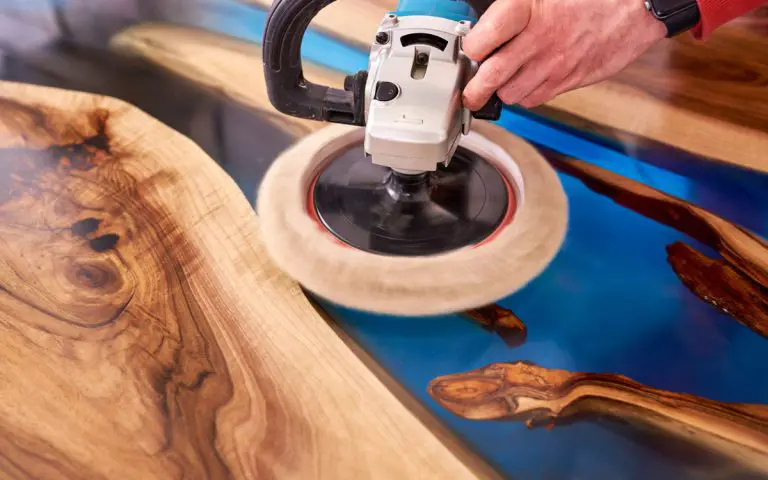
Tip: If your resin letter keychain has rough edges, you can lightly sand them off or use a deburring tool to peel away the rough edges. (Find one on Amazon or Aliexpress *Paid Links) This tool is convenient and should be in your “resin must-have tool stash.”
*Paid Links
Step 4: Add the Metal Keychain Parts
For this step, you will need a few supplies:
- You’ll need a small handheld drill to make a tiny hole in your resin letter keychain. Here are two great options:
- Hand drill (Find one on Amazon or Aliexpress *Paid Links)
- Electric resin drill set (Find one on Amazon or Aliexpress *Paid Links)
*Paid Links
- Then you’ll also need the actual metal keychain parts. You can buy them as a set or as separate pieces. Have a look at these:
- Keychain kit (Find one on Amazon or Aliexpress *Paid Links)
- Keychain ring with chain (Find one on Amazon *Paid Links)
- Jump rings (Find one on Amazon or Aliexpress *Paid Links)
- Screw eye pin (Find one on Amazon or Aliexpress *Paid Links)
*Paid Links
- To finish off your keychain, you’ll need some tassels. (Find one on Amazon or Aliexpress *Paid Links)
- Lastly, you need the proper tools (Find one on Amazon or Aliexpress *Paid Links) to assemble the keychain. Believe us when we say these tools will make a huge difference in how easy it is to assemble these parts or what a complete nightmare it could be!
*Paid Links
Now that you have all your supplies, here’s what you need to do:
- Drill a hole: You can drill a hole through the front of the letter or from the top. We decided to drill the hole from the top and insert a screw eye pin. This is a preference. You could drill the hole from the front and insert a jump ring to connect the chain.
- Connect the metal chain: If you use a screw eye pin, you need to add a jump ring. The jump ring will connect the keychain ring and chain to the screw eye pin. Using a jump ring instead of a screw eye pin, you can connect the keychain ring and chain directly to the jump ring. For this process, you will need your pliers to open and close the jump ring.
- Add a tassel: You’ll need another jump ring to connect your tassel to your keychain. Open up the jump ring with your pliers, insert the jump ring into the little cap of the tassel, then loop the keychain ring into the jump ring, and then close the jump ring with your pliers. And boom 💥, your first resin letter keychain is complete!
This step could be tricky as you’ll need to find your groove when drilling the holes and the sequence that works for you when assembling the metal keychain. But it will soon become second nature to you 😃
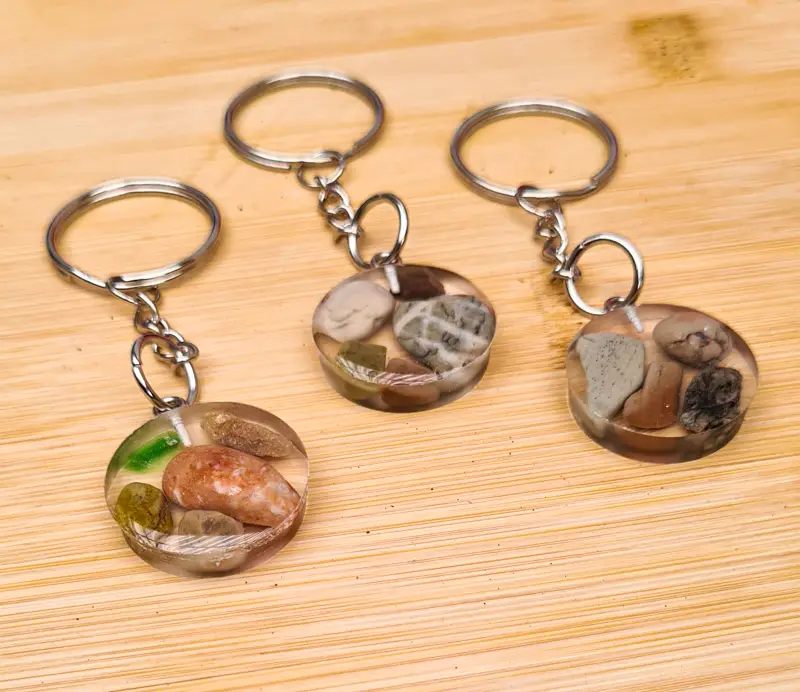
Design 2: Round Resin Keychain With Pebbles
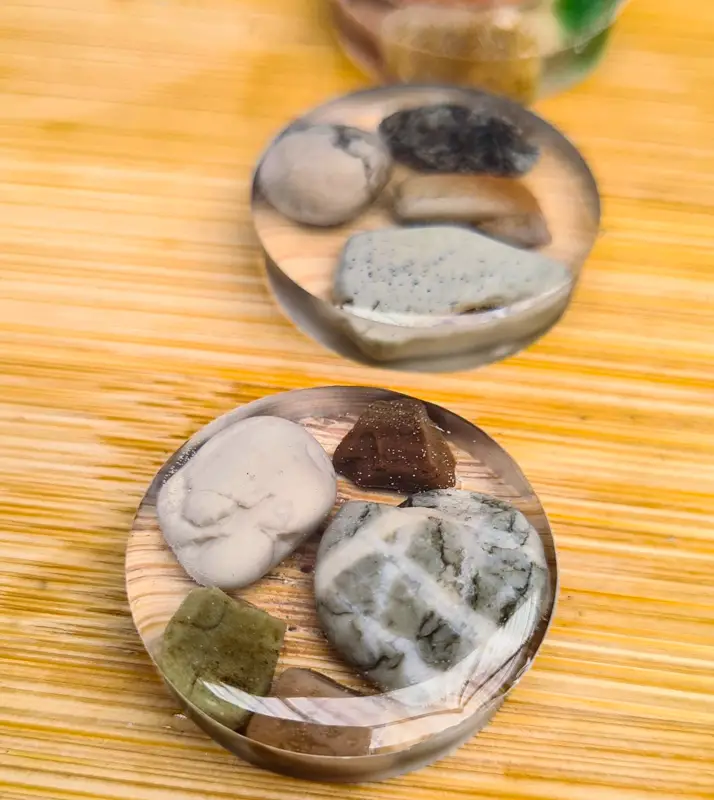
This design is quite easy, but the result is stunning and has a three-dimensional look to it.
These keychains are an excellent way of preserving little pebbles from a place near and dear to you or perhaps from an awesome trip you’ve been on.
Step 1: What You’ll Need
You won’t need anything more than what we’ve already mentioned for this design.
If you need a little round mold, here’s an excellent option: (Find it on Amazon or Aliexpress *Paid Links)
*Paid Links
Instead of pebbles, you can use gemstones or small pieces of colored glass. Make sure the items you’re inserting into your resin are completely dry. Any moisture embedded into resin could spoil and rot and ultimately ruin your project.
We opted to use clear resin to highlight all the natural colors of the pebbles. But you can color your resin if you prefer.
Step 2: Cast Your Resin
To recap, you’ve completed all your prep work and mixed resin, and your mold and workspace are ready!
Here’s how to cast pebbles into resin:
- Pour a thin resin layer: This layer will act as a base. For example, if you add your pebbles and then cover them with resin, you will see quite a few bubbles rising to the top as the resin tries to fill all the gaps between and under your pebbles. And when you de-mold your project, you might find some exposed pebbles (not covered with resin) on the back of your keychain. This thin base layer of resin will avoid all of this.
- Add your pebbles: Carefully insert your pebbles into your mold. You can move them around and position them as you prefer. Make sure not to scrape them across the mold. Instead, pick them up with a tweezer and then drop them back into the resin. This will avoid any exposure to the back of your pebbles.
- Cover with resin: Now, slowly pour your resin into the mold and cover each pebble. Fill your mold to the brim.
Tip: Sort your pebbles before casting your resin. Check if they fit inside your mold. If they stick out at the top, that isn’t a train smash – it adds to the piece’s character. If you prefer a flush look, sort and prepare your pebbles beforehand to avoid using up some of the working time of your resin and causing any flash curing.
Step 3: Let Your Keychain Cure
As you know by now, we need to practice patience before we can marvel at the beauty of our creation. Allow your keychain to cure for at least 24 to 72 hours. After that, you can de-mold it.
Step 4: Add the Metal Keychain Parts
Follow the same steps in Design 1, and you’re good to go!
Design 3: Personalized Resin Keychain
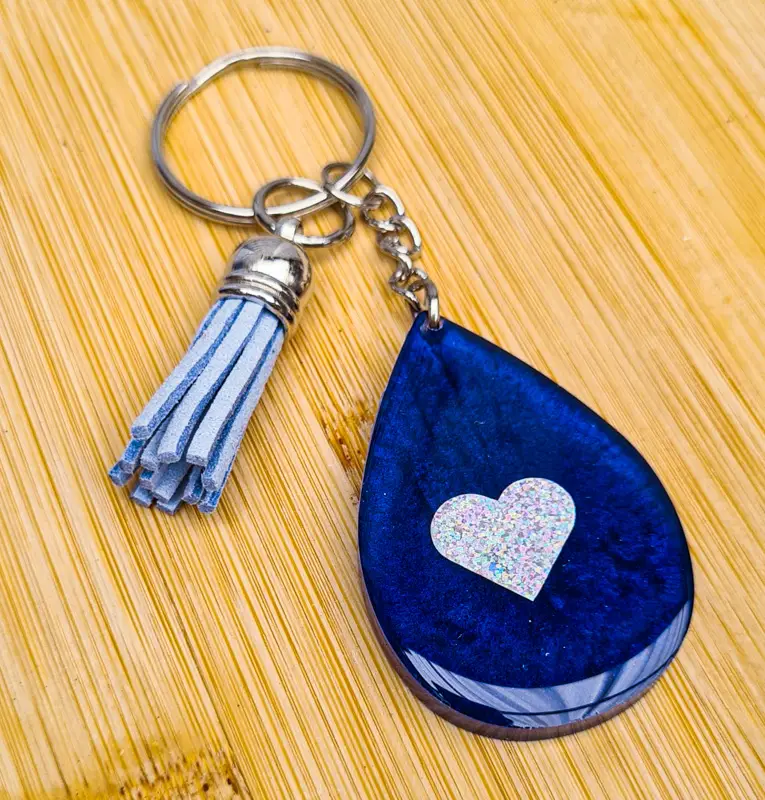
We’re going up a notch and creating a custom resin keychain for our third design! But, of course, this also makes it an original resin keychain design.
This design involves two layers of resin and a touch of personalization using vinyl or stickers.
Step 1: What You’ll Need
The only additional supply you’ll need is a sticker or some vinyl.
We used an earring mold for this design. Here you can purchase the same mold from Amazon or Aliexpress.
*Paid Links
Feel free to use any color combination you like. We opted for a pearlescent sapphire base, a silver glitter vinyl that we cut into a heart shape using a Cricut machine, and a clear top coat of resin to seal it all in.
Let’s get into it!
Step 2: Cast Your Resin
Follow these steps to cast your personalized resin keychain:
- Pour your base color: Slowly pour your base color into your mold. Earring molds are especially shallow, so be sure to pour slowly, carefully, and with control.
- Let your base layer cure: Allow your first layer to cure for a minimum of four to six hours. Your resin should be firm and hard to the touch.
- Add your vinyl/sticker: Carefully place your sticker on your base color. Check all your measurements beforehand to ensure your sticker fits inside your design. Then, rub the sticker, so it’s completely stuck to your base layer.
- Add your top coat: Pour your clear resin into your mold, ensuring it covers the entire surface of your base layer and sticker. Fill it to the brim of your mold, maybe even a bit higher, to give it a dome effect. Be careful not to overfill your mold, as this will result in your resin spilling over the sides and causing a mess.
Step 3: Let Your Keychain Cure
Yes! It’s that time again! Allow your keychain to cure for at least 24 to 72 hours. After that, you can de-mold it.
Step 4: Add the Metal Keychain Parts
Follow the same steps as listed above in Design 1. The only step you need to skip is drilling the hole.
The earring mold (and some other molds) includes a part that creates a hole for you – score 🤩
And that’s a wrap, guys! Three cute resin keychains are done and dusted!
Final Thoughts
Resin keychains are so versatile, making them great for beginner projects.
One mold allows endless options because you can play around with colors, inserts, and layers.
The absolute winner is the amount of resin these molds use – it’s a small amount that allows you to be creative, make mistakes, and learn techniques, all without wasting a lot of resin and breaking the bank.
So go on! Have fun and master your skills!
If you enjoyed this article, please share it on social media!


Spot on with this write-up, I honestly feel this web site needs a lot more attention. I’ll probably be returning to read more, thanks for the info!